
 how-to
How to Export LightBurn-Ready Files: Step-by-Step
Table of Contents
- Understanding LightBurn File Formats and Compatibility
- How to Prepare Your Image for LightBurn
- Exporting SVG Files for LightBurn
- Step-by-Step: Export Your Design as LightBurn-Ready
- Choosing the Best File Format for LightBurn Projects
- Troubleshooting Common Export and Import Issues
- Sending and Transferring Your LightBurn Files
- Frequently Asked Questions
Last Updated: October 6, 2026
Understanding LightBurn File Formats and Compatibility
When you export lightburn ready files, format choice is the first critical step. Some formats keep layers and text editable; others flatten everything into a raster image. Choosing correctly saves hours of rework.
Formats fall into three categories: native LightBurn files, vector formats, and raster images.
Native LBRN2 Format
LBRN2 is LightBurn's native file format. It preserves every detail of your project: layers, text, colors, tool assignments, and machine settings.
The advantage is complete fidelity: everything stays exactly as configured, with no conversion losses.
The drawback: LBRN2 files only open in LightBurn, so sharing with other software or archiving long-term locks you in.
For production workflows where you control the entire pipeline, LBRN2 is your safest choice.
Vector Formats: SVG, DXF, and AI
Vector formats store designs as paths and shapes, making them scalable and editable across programs.
SVG (Scalable Vector Graphics) is the most universal vector format.
DXF (Drawing Exchange Format) is the CAD and laser-cutter standard, and often the native language for xTool machines or older CNC equipment.
AI (Adobe Illustrator) files are proprietary.
For maximum compatibility, SVG wins. For CAD workflows, DXF is essential. For Adobe-only shops, AI works but requires testing.
Raster Formats and When to Use Them
Raster images (PNG, JPG, BMP) are grids of colored pixels: not scalable, not editable as shapes or text.
Use raster only for photographs or detailed artwork that can't become vector paths: a face, a watercolor, a complex gradient.
LightBurn converts raster imports to engravings via dithering or grayscale depth mapping, but you lose per-element control.
How to Prepare Your Image for LightBurn
Before you export, clean and organize your design. Messy artwork causes import errors, distorted scaling, and unrecognizable layers.
Cleaning Up Your Artwork
Remove anything you don't need: hidden layers, guides, reference objects, and merged layers you won't adjust separately.
Check your canvas size. Make sure the artboard or canvas dimensions match your actual workpiece.
Zoom in for stray points or broken paths, merge overlapping shapes, and simplify paths with excess points.
Convert decorative fonts to outlines if your machine doesn't support text rendering; keep standard fonts as text so you can edit later without re-exporting.
Organizing Layers and Text
Each LightBurn layer can carry different tool settings: one for cutting, another for engraving, another for marking.
Organize by intended action: cut lines on one layer, deep engravings on another, surface marks on a third.
Keep text on its own layer to prevent accidental path conversion and simplify text-only edits.
Check color assignments: in some programs red = cut, black = engrave, blue = mark.
Exporting SVG Files for LightBurn
SVG is the most reliable format to export lightburn ready files: open-source, widely supported, and handled exceptionally well by LightBurn.
Export Settings for SVG Compatibility
Key SVG export options:
Decimal precision: At least 2-3 places, preserving detail without bloating file size.
Text handling: Choose "Convert text to paths" only if you plan to never edit text again.
Embedded images: Choose "Link" rather than "Embed", embedded rasters bloat files, while linked images keep the SVG lean.
Units: Match your machine, inches or millimeters. Mismatches cause scaling errors.
Color mode: Ensure your SVG uses RGB or indexed color, not CMYK. Laser machines don't understand print color spaces.
Validating Your SVG Before Import
After exporting, open the SVG in Inkscape or a browser: are all shapes visible and text readable?
Check file size: a simple logo SVG should be under 100 KB. Megabytes mean embedded images or excessive path complexity.
Scan the code in a text editor for <image>, <text>, and <path> tags. Thousands of path nodes for a simple shape means inefficient export, simplify and re-export.
Step-by-Step: Export Your Design as LightBurn-Ready
This is the workflow we recommend at Laser Layer Maker for getting any design into LightBurn without surprises.
Step 1: Finalize Your Design
Open your design in Adobe Illustrator, Inkscape, Corel Draw, or any vector editor.
Review every element:
- Strokes and fills correct?
- Text final and formatted?
- Layers organized and named?
- Canvas size matches your workpiece?
Save your work before exporting.
Step 2: Choose Your Export Format
Match format to workflow:
- Maximum compatibility: SVG
- CAD workflows or xTool machines: DXF
- LightBurn-only projects: LBRN2
- Photos or detailed artwork: PNG or JPG (raster)
If uncertain, SVG is safest, it works with every laser machine and software combination.
Step 3: Configure Export Settings
Go to File > Export As (or "Save As"), select your format, and the format-specific options appear.
Set these key parameters:
| Setting | Value | Why |
|---|---|---|
| Units | Match your machine (inches or mm) | Prevents scaling errors |
| Decimal precision | 2-3 places | Preserves detail without bloat |
| Text handling | Keep as text if possible | Allows editing in LightBurn |
| Color mode | RGB | Laser machines use RGB, not CMYK |
| Embedded assets | Link, don't embed | Keeps file size manageable |
Click Export and use a descriptive filename: "logo_for_tumbler_v2" beats "design1."
Step 4: Export and Save
Confirm the exported file exists at your save location and check that its size is reasonable for the design's complexity.
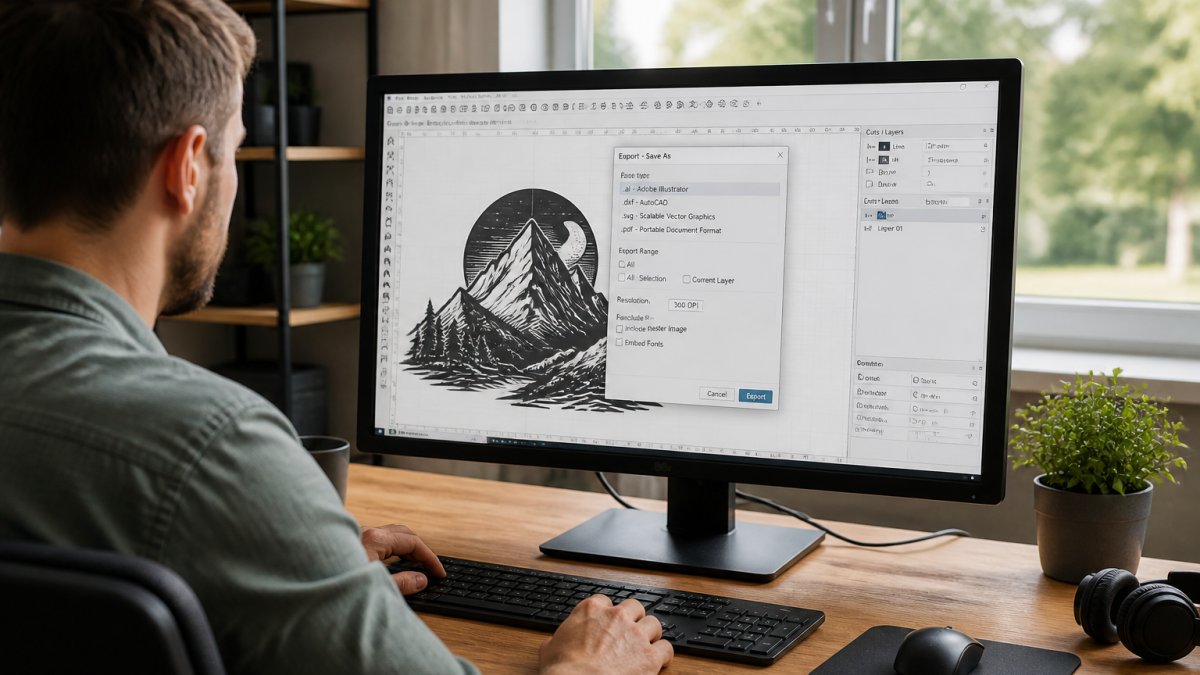
Step 5: Import and Test in LightBurn
In LightBurn, go to File > Open and select your exported file. Check immediately:
- Scaling: Does the design appear at the size you expect?
- Layers: Do your organized layers import as separate layers in LightBurn?
- Text: Is text still editable, or did it convert to paths?
- Colors: Do colors match your design?
- Detail: Are all fine lines and small shapes visible?
If anything looks wrong, fix it in the source software and re-export, faster than correcting inside LightBurn.
Once the import looks correct, assign tool settings, which layer cuts, which engraves, at what depth, and test on scrap before your final piece.
Choosing the Best File Format for LightBurn Projects
Match format to workflow to prevent headaches.
LBRN2 vs. SVG vs. DXF: Which One to Use
Choose LBRN2 if:
- You work entirely within LightBurn
- You want all tool settings and machine configuration preserved
- You don't share files with other software
- You're archiving finished projects
Choose SVG if:
- You design in Adobe, Inkscape, or other vector software
- You need cross-machine, cross-software compatibility
- You want text editable after import
- You share designs with team members on different tools
Choose DXF if:
- You work with CAD software like AutoCAD or Fusion 360
- Your machine is xTool or another CAD-native system
- You need precise technical specifications
- You're importing from industrial design workflows
Format Selection by Workflow Type
E-commerce sellers on Etsy or Shopify doing high-volume custom engravings should standardize on SVG: fast to export, reliable to import, and machine-agnostic.
Fabrication shops with multiple machines benefit from DXF for technical work and SVG for design work.
Graphic designers creating multi-layer client files should export SVG and LBRN2 together: SVG is universal, LBRN2 is the production file.
Hobbyists and makers testing new designs should start with SVG: forgiving, widely compatible, minimal setup.
Troubleshooting Common Export and Import Issues
How to fix the most common problems.
File Appears Distorted After Import
Distortion usually means scaling error or unit mismatch.
Check your original canvas size: an 8x10 inch canvas should export as 8x10 inches. If LightBurn shows 80x100 or 0.8x1, your units didn't translate.
Solution: Re-export with units explicitly matching your machine (inches or millimeters), and flatten any embedded transforms or rotations first, they don't always export cleanly.
Layers or Text Not Recognized
Text converts to paths when font information isn't embedded or the format doesn't support text objects.
Solution: Convert all text to outlines before exporting. You lose text editability in LightBurn, but the design imports cleanly.
Alternatively, use standard fonts (Arial, Helvetica, Times) that LightBurn recognizes natively and often keeps editable.
For layers: some formats flatten everything, so enable "preserve layers" or "export layers" if available.
Scale and Unit Mismatches
The most common import problem: a 4x6 inch design shows up in LightBurn as 40x60 or 0.4x0.6 inches.
The cause: export units don't match your machine's units, or your software used different units than you thought.
Solution: Confirm canvas size and units in File > Document Properties before exporting.
Set export units to match your canvas (inches or millimeters), then confirm in LightBurn under Edit > Machine Settings, updating if mismatched.
Export Fails or File Won't Open
If export crashes or LightBurn won't open the file, it's likely corrupted or too complex.
Solution: Create a new document, copy the design in, and export from there, this often clears hidden corruption.
If still too complex, delete unused layers, merge paths, and remove effects and filters that don't export cleanly.
For files over 50 MB, export in smaller pieces and import them separately.
Sending and Transferring Your LightBurn Files
Once files are ready, get them to your laser or share them with your team.
On the same computer as your laser, save the LBRN2 project locally and LightBurn accesses it instantly.
For team sharing, SVG and DXF work best, universal and editable by anyone. LBRN2 requires LightBurn.
Google Drive, Dropbox, or OneDrive work well: upload files, share the folder link, and everyone can download and work.
For photos and complex artwork needing multi-layer depth mapping, Laser Layer Maker automatically converts images into laser-ready layered files. Whether you export SVG, DXF, or xTool Studio, the principles stay the same: clean source, correct format, validation before import.
Frequently Asked Questions
What is the best file format for LightBurn projects?
The best file format depends on your workflow. LBRN2 is LightBurn's native format and preserves all settings, making it ideal for saving projects you'll edit later. SVG and DXF are universal vector formats that work across different software, so use them when transferring files between applications or machines. For photo-based engraving, PNG or JPEG raster formats work, but vector formats give you more control over cutting and engraving paths. Start with SVG if you're unsure, it's widely supported and handles most laser cutting and engraving tasks well.
How do I export an SVG for LightBurn?
In most design software, go to File > Export As and select SVG as your format. Before exporting, ensure all text is converted to paths and artwork is flattened if needed. In the export dialog, check for options like 'Convert text to paths' and 'Include strokes.' Save the file with a clear name, then open LightBurn and import it via File > Open. Verify that all layers and paths imported correctly by checking the preview before sending to your laser machine.
Why does my file look different after importing it into LightBurn?
Scale and unit mismatches are the most common cause. If your design software used inches but LightBurn expects millimeters, your artwork will appear the wrong size. Check the units in both applications and ensure they match before exporting. Strokes may also convert differently, some software exports strokes as paths, which can change appearance. Preview your file in LightBurn before cutting to catch these issues. If text or layers disappeared, they may not have been properly converted to paths during export.
Can I use PNG or JPEG files for laser engraving in LightBurn?
Yes, LightBurn accepts PNG and JPEG raster files for engraving detailed photos and complex images. However, raster files don't give you the precise control over cutting paths that vector files do. If you need clean cuts with sharp edges, vector formats like SVG or DXF are better. For photo engraving on tumblers, mugs, or other surfaces, raster files work well. Just ensure your image resolution is at least 300 DPI for quality results, and test on scrap material first to check the engraving depth.