
 how-to
Split Laser Layers: The Complete How-To Guide
Table of Contents
- Why Splitting Laser Layers Matters for Your Projects
- Understanding Layers, Colors, and Operations in Laser Design
- Converting Photo to Laser Engraving Layers
- Working with LightBurn Layers Step-by-Step
- Configuring Laser Cutting Layer Settings
- Creating Layered Laser Art for Multi-Depth Projects
- Exporting Separate Toolpaths and File Formats
- Registration and Alignment for Separately Cut Layers
- Frequently Asked Questions
Last Updated: October 5, 2026
Why Splitting Laser Layers Matters for Your Projects
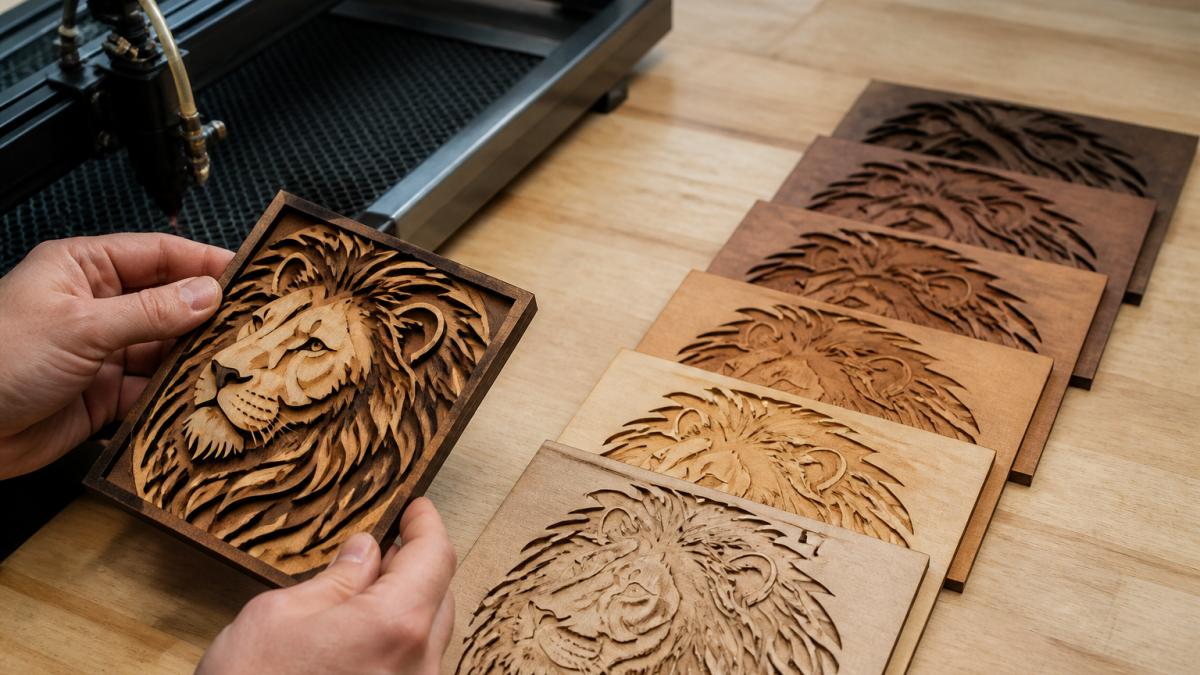
The difference between a flat single-layer file and a properly split multi-layer design using split laser layers is the difference between amateur and professional results. Splitting laser layers lets you control depth, speed, and power independently for each part of your design.
Most people send a single file to their laser and hope for the best. The results are predictable: uneven engraving depth, burnt edges, and details that disappear.
The fix isn't better equipment or more power. It's organizing your file so each layer does exactly one job.
Here's what you'll learn: how to structure design files, why layer order matters, when to use colors versus separate operations, and how to export files that work in LightBurn, xTool Studio, and other software.
Understanding Layers, Colors, and Operations in Laser Design
What Layers Actually Do
Layers in laser design are like stacked sheets of glass, each with different settings. Your laser processes them in order, first to last or last to first, depending on your cut order settings.
A layer isn't just visual organization. It's an instruction set: "Use these settings (speed, power, interval) for this geometry." Five layers means five different instructions.
Engrave a photo all at once and shadows and highlights get the same treatment: shadows burn, highlights fade.
Color Groups vs. Separate Toolpaths
This is where confusion starts. In design software like Illustrator or Inkscape, you organize artwork by color. In laser software like LightBurn, you organize by operation.
A color group is a visual organization tool. A separate toolpath is a laser instruction that tells your machine what to do and how.
The practical difference: red lines and red fills need separate toolpaths in LightBurn if you want to cut one and engrave the other.
The key insight: organize your design file by color in your design software, and your laser operations by layer in your laser software.
Converting Photo to Laser Engraving Layers
Preparing Your Image File
Start with a clean, high-contrast image. If your photo is dark and muddy, no amount of layer splitting will fix it. Brightness and contrast matter more than resolution.
Use these steps:
- Open your photo in an image editor (Photoshop, GIMP, or even a basic editor)
- Increase contrast by 20-30%
- Boost brightness slightly if the image is dark
- Crop to remove unnecessary background
- Save as PNG or TIFF (lossless formats preserve detail)
Keep the file under 10 MB. Larger files slow processing and introduce compression artifacts that kill fine detail.
For logos, convert to grayscale first to focus on tone and contrast. Handle multiple colors in the layer-splitting step, not here.
Automating Layer Separation
Manual layer separation in Illustrator takes hours. Laser Layer Maker automatically splits images into engraving-depth layers, turning a photo into a file ready for LightBurn or xTool Studio in minutes.
The process works like this:
- Upload your image (photo, cartoon, logo, or sketch)
- The tool analyzes tone and contrast across the image
- It creates separate layers for light, mid, and dark tones
- You export to SVG, DXF, or xTool format
You get a structured file with layers organized by depth. From there, fine-tune settings in your laser software and cut.
Manual alternatives require design skills and patience. If you're processing many photos, automation saves significant work.
Working with LightBurn Layers Step-by-Step
Importing and Organizing Your Layers
Open LightBurn and import your file (SVG, DXF, or PDF). If you used Laser Layer Maker or another automated tool, layers should already be separated. Otherwise, check the Layers panel on the left.
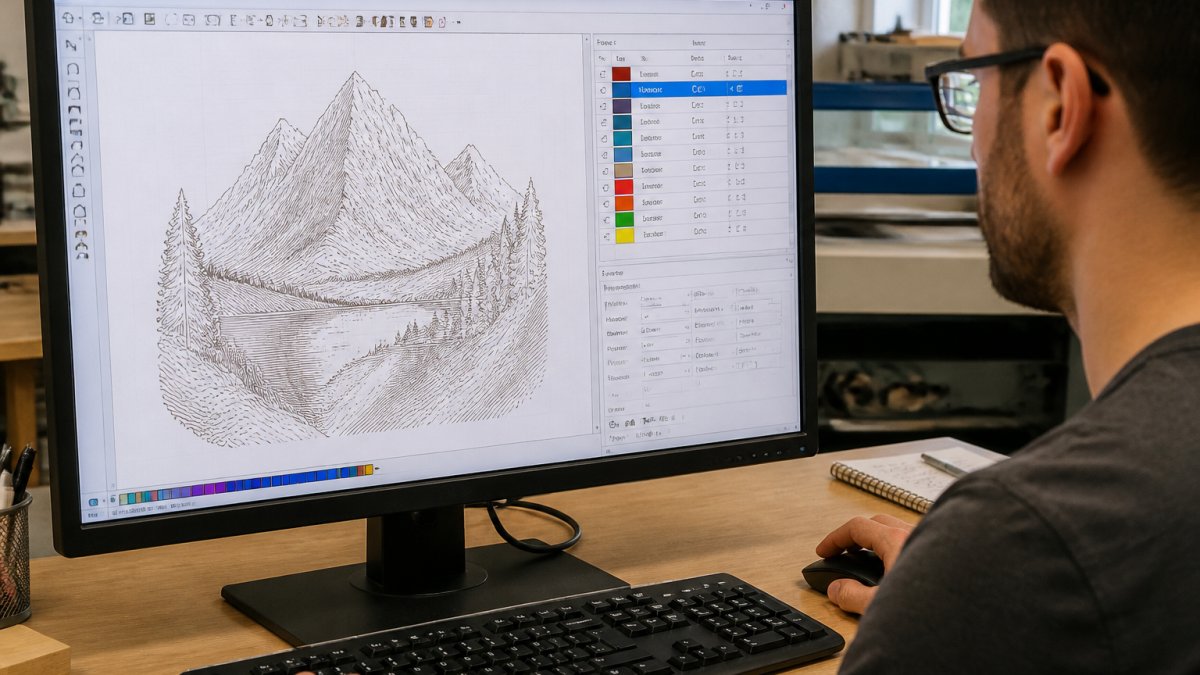
LightBurn displays layers as a list. Click a layer to see its geometry, and rename for clarity: "Light Tones," "Medium Tones," "Dark Tones" beats "Layer 1," "Layer 2," "Layer 3."
Group related layers if your design has multiple sections, portrait layers in one group, text layers in another, to keep the file organized and adjust settings across similar elements.
Setting Cut Order and Layer Sequence
Order matters. Your laser processes layers bottom to top (or top to bottom, depending on settings). Engrave before you cut and the laser cuts through partially-engraved material, ruining detail. Cut first and you have nothing left to engrave.
The golden rule: engraving layers first, cut layers last.
In LightBurn, drag layers to reorder. The bottom layer processes first, so drag engraving layers to the bottom and cut layers to the top.
For multi-depth engraving with no cutting, order layers lightest to darkest to prevent re-engraving that causes scorching and uneven depth.
Configuring Laser Cutting Layer Settings
Assigning Speed, Power, and Interval to Each Layer
Select a layer in LightBurn. Look at the right panel for "Cut Settings." You'll see fields for Speed, Power, and Interval.
Start with these defaults:
- Light engraving: 80% speed, 25% power, 10 interval
- Medium engraving: 60% speed, 40% power, 5 interval
- Dark engraving: 40% speed, 60% power, 3 interval
- Cutting: 30% speed, 100% power, 0 interval
These are starting points. Your actual settings depend on your material (wood, acrylic, leather, fabric), your laser model, and your design. Test on scrap material before running a full job.
The interval controls detail. Smaller intervals (2-3) create fine detail and smooth gradients. Larger intervals (10+) create rough texture and run faster. For photo engraving, use 3-5.
Separating Cutting from Engraving Operations
If your design includes both cutting and engraving, they must be on separate layers with different operation settings. Cutting requires 100% power and fast movement.
Create a new layer for cuts.
Set the operation type: in the Cut Settings panel, select "Cut" from the dropdown. This tells LightBurn to process this layer as a cutting operation, not an engraving.
Do the same for engraving layers. Select "Engrave" from the operation dropdown. This applies engraving-specific defaults and prevents LightBurn from treating engrave geometry as cuts.
Creating Layered Laser Art for Multi-Depth Projects
Arranging Multiple Parts on Your Work Area
If you're cutting multiple copies of the same design or several different designs in one job, arrange them efficiently on your work area. This reduces laser travel time and saves material.
In LightBurn, use the Arrange tools to position parts:
- Select multiple parts with Ctrl+Click (or Cmd+Click on Mac)
- Go to Tools menu and select "Arrange"
- Choose "Grid Arrange" to space parts evenly
- Set spacing (usually 0.25 inches between parts)
- Click "Arrange"
LightBurn will automatically position your parts in a grid. This saves time and ensures consistent spacing.
For irregular shapes, arrange manually. Drag parts close together but leave enough space for the laser head to move between them without hitting material or clamps.
Optimizing Laser Travel and Job Time
The laser doesn't teleport. It travels from one point to the next, and that travel time adds up. Optimizing layer order and geometry arrangement cuts job time significantly.
Use LightBurn's "Optimize" feature: select your layers and go to Tools > Optimize. This reorders the laser's path to minimize travel distance. For a complex design with hundreds of lines, optimization can cut 20-30% off job time.
Arrange layers so related geometry is grouped. If you have scattered small engravings across a large piece, group them by location (top half, bottom half) rather than by operation type. This reduces jumping around the work area.
Exporting Separate Toolpaths and File Formats
Choosing the Right Export Format
Your design software and laser software must speak the same language. LightBurn reads SVG, PDF, and DXF files. xTool Studio reads SVG and DXF.
SVG (Scalable Vector Graphics) is the best choice for most projects. It preserves layer information, scales without losing quality, and works across all major laser software.
DXF (Drawing Exchange Format) is older but widely supported. It preserves layers and works well for cutting operations.
PDF works for simple designs but doesn't preserve layers well. Avoid it if you're splitting layers, you'll lose your layer organization during export.
Export from your design software:
- In Illustrator: File > Export > SVG, check "Preserve Illustrator Editing Capabilities"
- In Inkscape: File > Save As > SVG, choose "Inkscape SVG"
- Using Laser Layer Maker: select your format (SVG, DXF, or xTool) and download
Preserving Layer Information During Export
Not all exports preserve layers automatically. You need to check your export settings.
In Illustrator, when you export to SVG, a dialog appears. Check the box for "Preserve Illustrator Editing Capabilities." This keeps your layers intact in the SVG file.
In Inkscape, layers are preserved by default in SVG export. No special settings needed.
When you export from Laser Layer Maker, layer information is built into the file. Each layer comes with pre-assigned operation type (cut, engrave, score) and default settings.
After export, open the file in LightBurn and verify your layers are there. Look at the Layers panel.
Registration and Alignment for Separately Cut Layers
Using Jigs and Registration Marks
When you're cutting or engraving the same piece multiple times (for multi-depth projects or repeat orders), alignment matters. A jig holds the material in the exact same position for each pass.
A simple jig is two straight edges (wood strips or metal rails) clamped to your laser bed. Position your material against these edges before the first cut.
For higher precision, use registration marks. Add small cross marks (+) to your design file at opposite corners. Before the second pass, visually align these marks with marks from the first pass. This compensates for tiny shifts in material placement.
Testing Alignment Before Full Production
Always test on scrap material first. Run one layer on a test piece. Remove the piece (carefully, it might be hot). Reposition it using your jig or registration marks.
Look at the alignment. Is the second engraving centered on the first? Are edges clean?
Once alignment is correct, you're ready for production. Run the full job on your actual material.
A test on scrap costs minutes and prevents problems.
| Step | Time | Frequency |
|---|---|---|
| Preparing image file | 5-10 min | Once per design |
| Automating layer separation | 2-5 min | Once per design |
| Organizing layers in LightBurn | 10-15 min | Once per design |
| Configuring speed/power settings | 15-20 min | Once per material type |
| Testing alignment | 10-15 min | Once per production run |
| Running full job | Varies | Per order |
Splitting laser layers transforms your results from inconsistent to professional.
Laser Layer Maker handles the most time-consuming part: converting your photo or logo into a properly layered file ready for LightBurn or xTool Studio.
Frequently Asked Questions
How do you split an image into layers for laser engraving?
Start by preparing a high-contrast image in grayscale or color. Use specialized software or automated tools that analyze image depth and convert it into separate engraving-depth layers. Import the resulting file into your laser software like LightBurn, where each layer represents a different cutting depth or intensity. Assign different power and speed settings to each layer based on material thickness and desired engraving depth. Export as SVG or DXF to preserve layer information for your laser cutter.
What's the difference between using color groups and separate toolpaths for split laser layers?
Color groups organize layers visually within your design file but execute in sequence based on your cut order settings. Separate toolpaths create independent operation sequences, allowing you to pause between cuts, change materials, or swap tools. For simple multi-depth engraving, color groups work well. For complex projects requiring tool changes or material swaps, separate toolpaths give you more control over the exact sequence and timing of each operation.
How many layers should a 3D laser engraving have?
The number of layers depends on your material thickness and desired depth variation. Most successful projects use 3 to 8 layers. Thicker materials like 0.5-inch plywood can handle more layers with noticeable depth differences. Thinner materials like veneer or acrylic work best with 3 to 4 layers to avoid cutting through. Start with fewer layers and test on scrap material to find the optimal balance between visual depth and structural integrity for your specific material.
What file format should I use for layered laser art?
SVG (Scalable Vector Graphics) and DXF (Drawing Exchange Format) are the most reliable formats for preserving layer information. SVG maintains color and layer data well in LightBurn and xTool Studio. DXF works across most laser software but may require manual layer reassignment after import. For photo-based projects, convert your image to grayscale first, then use software that exports to these vector formats while keeping each depth level as a separate layer or color group.