
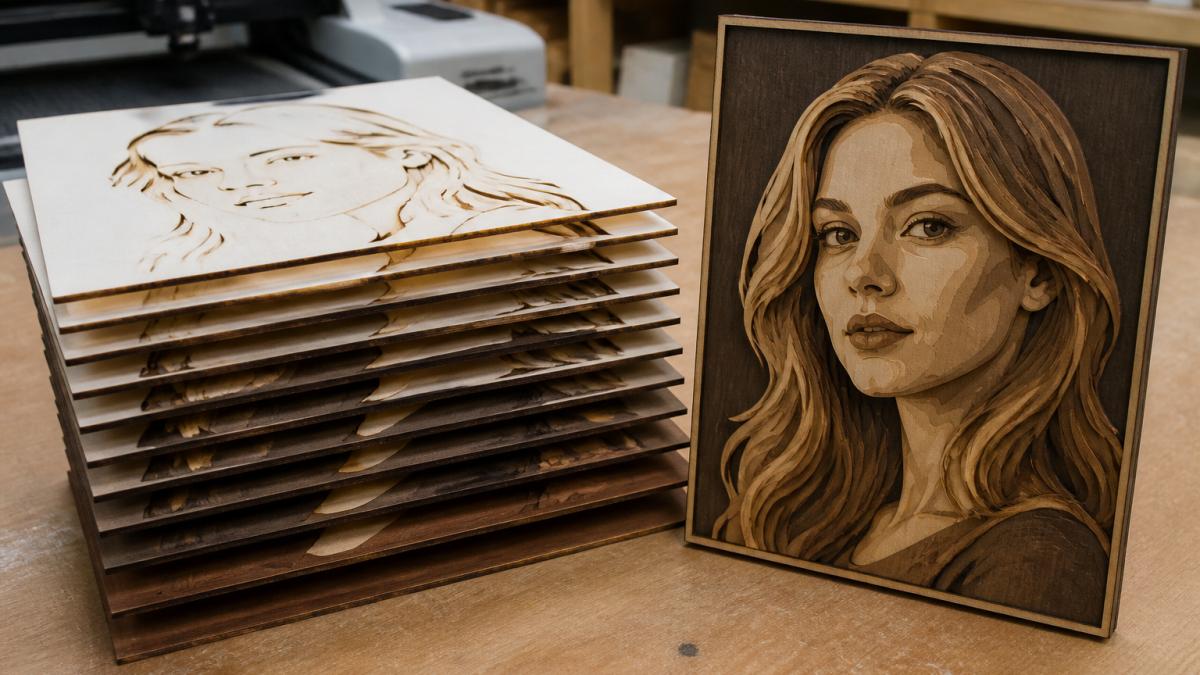
 how-to
Convert Photos to Layered Laser Files: 2026 How-To
Table of Contents
- What You'll Need Before You Convert Photos to Layered Laser Files
- How 3D Laser Engraving Software Turns a Photo into Depth Layers
- Step 1: Prepare Your Photo for Image Tracing and Layer Separation
- Step 2: Vectorizing Photos for Laser Cutters with Clean Cut Paths
- Step 3: Set Material Thickness and Kerf Compensation for Multi-Layer Stacking
- Multi-Layer Laser Art Design Tips for Shadow Boxes and Dioramas
- Automated vs. Manual Workflow: Which Is Faster for Your Shop?
- Common Mistakes to Avoid When Preparing Laser-Ready Files
- Frequently Asked Questions
Last Updated: September 29, 2026
What You'll Need Before You Convert Photos to Layered Laser Files
Converting photos to layered laser files starts with one hard truth: the photo matters more than the software. A clean, high-contrast image will trace well in almost any program. A blurry phone snapshot with busy backgrounds will fight you the whole way, no matter which tool you use.
- A source photo at 300 DPI or higher. Pixel density drives everything downstream.
- 3D laser engraving software that handles depth maps and vector traces.
- Your material thickness in millimeters, measured with calipers, not guessed.
- A kerf test coupon already cut on your machine.
- A scrap piece of your final material for test cuts.
How 3D Laser Engraving Software Turns a Photo into Depth Layers
3D laser engraving software reads brightness values in a photo and assigns each one a height. Bright areas become high points. Dark areas become low points. The result is a depth map: a grayscale image where tone equals thickness.
Depth Map vs. Vector Trace: Which Output to Choose
Pick a depth map when you want smooth gradients and 3D relief. Pick a vector trace when you need hard cut lines and separate physical pieces.
| Output Type | Best For | File Result | Laser Job |
|---|---|---|---|
| Depth map | 3D relief, engraved gradients | Grayscale height image | Raster engrave |
| Vector trace | Shadow boxes, stacked layers | Cut paths and nodes | Vector cut |
| Hybrid | Detailed portraits with cut borders | Both combined | Raster plus vector |
Step 1: Prepare Your Photo for Image Tracing and Layer Separation
Start by cropping tight to your subject. Busy backgrounds create noise that image tracing software reads as real detail.
- Crop to the subject only
- Raise contrast by 20-30%
- Posterize to 4-8 levels
- Remove backgrounds entirely
- Save a copy before you edit
Step 2: Vectorizing Photos for Laser Cutters with Clean Cut Paths
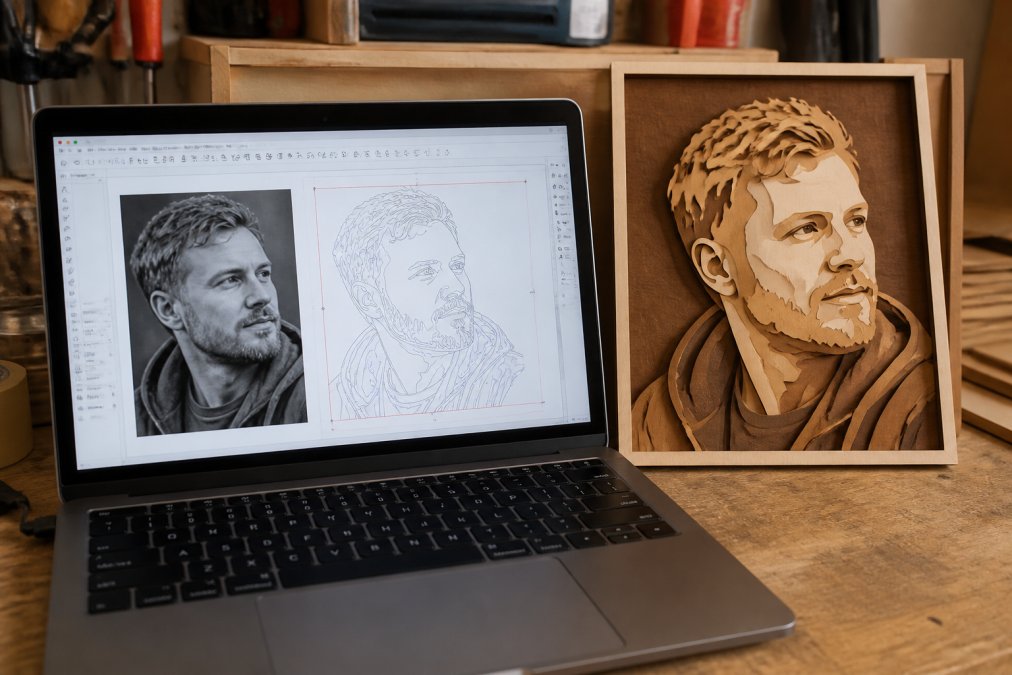
Vectorizing photos for laser cutters means turning pixels into paths. The software traces edges, then you clean up the mess it leaves behind.
Node Editing and Path Simplification Basics
Node editing is how you fix a bad trace. Delete redundant points, merge open paths, and smooth jagged curves by hand.
- Delete duplicate and overlapping paths
- Merge open segments into closed shapes
- Smooth sharp corners on organic curves
- Run path simplification at a low tolerance
- Check that every cut path is fully closed
Step 3: Set Material Thickness and Kerf Compensation for Multi-Layer Stacking
Kerf compensation is the offset that accounts for material your laser burns away. Every cut removes a sliver of wood, so each piece comes out slightly smaller than drawn. Measure your kerf by cutting a known square, then measuring the gap with calipers. Add half that value to your cut paths so stacked layers line up.
Thickness-to-Depth Calibration
The usable depth of a stack is the sum of your material thicknesses minus the glue lines. A common pattern is to treat each sheet as one "depth step" and plan the relief around that step size.
| Material Thickness | Typical Depth Step | Layers for ~18 mm Relief | Best For |
|---|---|---|---|
| 3 mm plywood | 3 mm | 6 layers | Fine detail, portraits |
| 4.5 mm plywood | 4.5 mm | 4 layers | Balanced detail and depth |
| 6 mm plywood | 6 mm | 3 layers | Bold silhouettes, signage |
| 1/8 in (3.175 mm) acrylic | 3.175 mm | 6 layers | Backlit shadow boxes |
| 1/4 in (6.35 mm) acrylic | 6.35 mm | 3 layers | Deep dioramas |
Kerf Compensation by Material
Kerf varies by material, thickness, lens, and power, never assume a single value across a shop. A common pattern is to measure each material once and save the profile.
-
Cut a 25 mm square test coupon in the target material
-
Measure the actual cut width with calipers
-
Record kerf as (drawn width − cut width) ÷ 2
-
Apply that offset outward on every cut path
-
Re-measure whenever you change material, thickness, or lens
-
Measure kerf on a test coupon for every new material
-
Apply the offset to every cut path, inside and outside
-
Match layer count to total stack height using the chart above
-
Keep thickness consistent across a single stack, mixing 3 mm and 6 mm in one stack throws off every depth step
Multi-Layer Laser Art Design Tips for Shadow Boxes and Dioramas
Multi-layer laser art design tips usually stop at spacing. Shadow boxes and dioramas need gaps between layers so light and shadow create depth, but the design is only half the project. The other half is assembly, and that is where most beginners lose hours.
Spacing and Layer Order
- Use wider gaps for dramatic shadow, tighter gaps for subtle relief
- Keep foreground layers thin so they do not cast hard shadows on the layer behind
- Add a backing layer in a dark tone to anchor the composition
- Number each layer on the back edge before assembly, once they are separated, they all look alike
- Dry-fit everything before gluing
Post-Processing and Assembly
This is the step most guides skip. Laser-cut edges come off the bed with soot, and soot plus glue equals a weak, dirty bond.
- Sand every layer. Lightly sand both faces and edges with 220-grit, then 400-grit. This removes char, opens the wood grain for glue, and prevents soot from smearing into your finish.
- Test-fit the stack dry. Assemble all layers without glue and check alignment against a straightedge. Fix any misfit now, not after glue-up.
- Glue in order, back to front. Use a thin, fast-setting wood glue or cyanoacrylate (CA) for small pieces. Apply glue to the back of the upper layer, not the face of the lower one, this keeps squeeze-out off visible surfaces.
- Clamp or weight each layer. Even pressure prevents warping. A flat board and a few clamps is enough for small stacks.
- Wipe squeeze-out immediately. Once wood glue dries, it will not take stain and shows as a pale line.
- Finish after assembly. A clear coat, Danish oil, or wax seals the wood and evens out the tone between layers. Finish the assembled piece, not individual layers, so the sheen is consistent.
Finishing Choices by Material
- Plywood: Sand to 400-grit, seal with a sanding sealer, then clear coat. Edges will show plies, embrace them or paint them.
- MDF: Seals well and takes paint evenly, but edges soak up finish. Seal edges first.
- Acrylic: No sanding needed. Wipe edges with isopropyl alcohol, bond with acrylic cement or CA, and polish edges with a flame or buffing wheel if you want clarity.
- Hardwood: Sand to 400-grit, raise the grain with a damp cloth, sand again, then oil or clear coat.
Dry-Fit Checklist Before Gluing
- All layers align against a straightedge
- Spacing matches your design intent
- No layer is warped or cupped
- Edges are sanded and free of soot
- Backing layer is oriented correctly
- You have a flat surface and clamps ready
Automated vs. Manual Workflow: Which Is Faster for Your Shop?
Automated workflows win on volume. Manual workflows win on control.
| Workflow | Time per Design | Best For | Control Level |
|---|---|---|---|
| Manual tracing | Hours | One-off custom art | Full control |
| Automated splitting | Minutes | High-volume shops | Good, with cleanup |
Common Mistakes to Avoid When Preparing Laser-Ready Files
Low-resolution source photos are the number one killer. Below 300 DPI, your trace picks up pixel blocks instead of edges.
- Using a blurry or low-DPI photo
- Forgetting kerf offset on stacked cuts
- Leaving open paths that never close
- Mixing material thicknesses in one stack
- Skipping the dry-fit before gluing
Frequently Asked Questions
How do I turn a photo into a laser engraving file?
Start with a high-contrast, well-lit photo and open it in software that supports image tracing or depth map generation. Adjust contrast and pixel density, posterize the image to reduce tones, then convert it to vectors or a grayscale depth map. Export as SVG or DXF for LightBurn or xTool Studio. Test on scrap material before running your production piece.
Can I convert an image to a laser cut file online?
Yes. Browser-based tools can handle bitmap to vector conversion and export laser-ready SVG or DXF files without installing desktop software. Upload your photo, pick a style or layer count, and download the result. Check that the export opens cleanly in your laser software and that cut paths are closed before you commit material.
What software is best for splitting photos into laser-ready layers?
The best choice depends on your volume and skill level. LightBurn handles cut paths and engraving settings well once you have a layered file. Dedicated converters like Laser Layer Maker split a photo into engraving-depth layers and export to LightBurn SVG, DXF, or xTool Studio. For occasional one-off projects, manual tracing in vector software works but takes far longer per file.
How do I prepare a photo for 3D depth-based laser engraving?
Convert the photo to grayscale, boost contrast so shadows and highlights are distinct, then generate a depth map where brightness maps to engraving depth. Set your laser power settings so lighter areas cut shallower and darker areas go deeper. Run a test tile at several power levels to dial in the depth range before engraving the final piece.
The gap between a rough trace and a professional layered file comes down to prep, kerf, and clean paths. Laser Layer Maker handles the hard part by splitting any photo into precise engraving-depth layers and exporting to LightBurn SVG, DXF, or xTool Studio. Stop hand-tracing every design and let the software do the splitting. Get started with Laser Layer Maker and turn your photo backlog into finished, laser-ready projects.