
 listicle
Imag-R Alternative for Layered Art: 7 Best Tools for 2026
Table of Contents
- Quick Comparison: Best Layered Art Software for Laser Engraving
- Laser Layer Maker: Purpose-Built for Multi-Layer Generation
- LightBurn: All-in-One Control with Built-In Dithering
- GIMP: Free Manual Layer Decomposition and Inpainting
- Inkscape: Vector Conversion for Stacked Line Art
- DithX and Atomm AI: Specialized Pre-Processing Scripts
- Juju Perfect: Done-For-You Layered Art Service
- How to Create Layered Wood Art: A Beginner Workflow
- Frequently Asked Questions
Last Updated: September 25, 2026
Quick Comparison: Best Layered Art Software for Laser Engraving
Finding a reliable imag-r alternative for layered art comes down to one question: prepare files by hand, or let software split your image into engraving-depth layers automatically? This guide from Laser Layer Maker compares seven tools, from design suites to done-for-you services.
| Tool | Price | Free Tier | Best For |
|---|---|---|---|
| Laser Layer Maker | Contact for pricing | No | Automated multi-layer file prep |
| LightBurn | $60 one-time | No | All-in-one image prep and machine control |
| GIMP | Free | Yes | Manual layer decomposition |
| Inkscape | Free | Yes | Vector conversion and stacked line art |
| DithX | Freemium | Yes | Dedicated dithering workflows |
| Atomm AI | Subscription | No | Batch, AI-driven processing |
| Juju Perfect | Per file/service | No | Done-for-you layered art |
Laser Layer Maker: Purpose-Built for Multi-Layer Generation
Laser Layer Maker empowers creators to transform any photo, cartoon, or logo into professional-grade, laser-ready layered files. It automatically splits an image into precise engraving-depth layers, then exports to LightBurn SVG, DXF, or xTool Studio.
Pros:
- Turns any image into laser-ready layered files
- Splits images into engraving-depth layers automatically
- Exports directly to LightBurn SVG, DXF, and xTool Studio
Cons:
- No free tier; pricing depends on quantity, dates, and delivery. Contact Laser Layer Maker for current prices or a quote.
LightBurn: All-in-One Control with Built-In Dithering
LightBurn handles image preparation and machine control in one program, which is why it's the default for so many laser owners. It includes brightness, contrast, and gamma adjustments plus dithering modes like Jarvis, Stucki, and Atkinson.
Pros:
- Industry standard for laser control
- One-time purchase with no subscription
Cons:
- Steeper learning curve for advanced image manipulation
GIMP: Free Manual Layer Decomposition and Inpainting
GIMP is a free, open-source raster editor that gives you total control over layer separation, if you're willing to do the work. Build each depth layer as its own mask, use clone and heal tools for inpainting, and export the stack as PSD or TIFF.
Pros:
- Completely free and open-source
- Highly flexible for complex artistic edits
Cons:
- Requires manual effort to prepare files for laser cutting
Inkscape: Vector Conversion for Stacked Line Art
Inkscape is a free vector editor built for path work, and its Trace Bitmap tool converts raster images into SVG paths, the right pick for stacked line art rather than photographs.
Pros:
- Excellent vector handling
- Active community support and tutorials
Cons:
- Not designed specifically for laser engraving workflows
DithX and Atomm AI: Specialized Pre-Processing Scripts
- Floyd-Steinberg, the classic error-diffusion method; smooth gradients, but can produce visible worm-like artifacts on flat areas.
- Stucki, a faster error-diffusion variant that spreads error across a wider neighborhood; good general-purpose choice for photos.
- Atkinson, diffuses only a fraction of the error, which produces lighter, higher-contrast output that many makers prefer for portraits on wood.
- Jarvis, Judice, and Ninke, heavier computation, finer grain, useful when you want maximum tonal fidelity on a slow pass.
- Ordered (Bayer) dithering, a fixed matrix pattern rather than error diffusion; produces a regular halftone-like texture that reads cleanly on small engravings.
| Tool | Approach | Standout Feature | Main Limitation |
|---|---|---|---|
| DithX | Focused dithering | Material-tuned algorithms and real-time preview | Narrow feature set; no layer decomposition |
| Atomm AI | Cloud automation | Batch processing with material profiles | Less control over nuance; per-image tuning is manual |
Neither tool replaces layer decomposition. DithX and Atomm AI prepare a single image for a single engraving pass; for multiple depth layers, you still need a tool that splits the image first, then run each layer through your dithering workflow.
Juju Perfect: Done-For-You Layered Art Service
Juju Perfect isn't software you operate. It's a conversion service that turns your photo into laser-ready SVG and UV-print files, generates cut lines automatically, and includes commercial licenses for the finished goods.
Pros:
- Includes commercial usage rights
- Ready-to-cut file output
Cons:
- Not a DIY software tool
How to Create Layered Wood Art: A Beginner Workflow
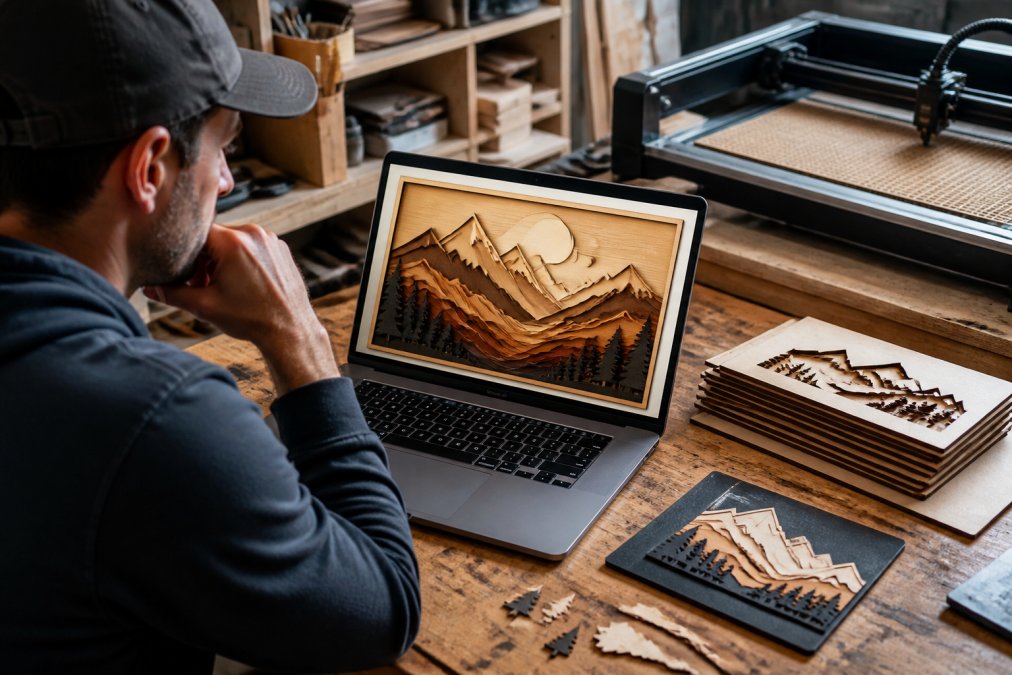
Learning how to create layered wood art follows five repeatable steps, but the step most guides skip decides whether your first project succeeds: translating digital layers into actual machine settings. A perfect SVG still fails if power and speed are wrong for the material.
-
Pick the right source image. High contrast and clear subject separation beat resolution every time. Aim for an image where the subject reads clearly when you squint. Portraits with plain backgrounds, pet photos, and simple logos work well; busy photos with soft shadows and landscapes with lots of midtones do not.
-
Convert to grayscale and separate tones. Decide how many depth layers you need, three to five is sensible for a first project. In GIMP, use Threshold or Posterize to collapse the grayscale into discrete bands, then Select by Color on each band and save it as its own layer. In an automated tool, this is a single button based on the tonal histogram.
-
Generate your layers. This is where an automated tool saves the most time. Manual masking in GIMP works but eats the bulk of your hour, each layer needs a clean edge, because every jagged pixel in your mask becomes a jagged cut line.
-
Set variable layer thickness. Match each layer's depth to the material and desired effect: thin layers read as subtle shading, thicker ones create hard steps. For 1/8-inch (about 3 mm) birch plywood, start around 0.1 inch per layer for subtle shading and 0.2 inch for pronounced steps. Layers must fit inside your material's total thickness, you can't cut five 0.2-inch layers from 0.25-inch stock.
-
Export and test cut. Run a small test piece before committing a full sheet. Check your layer ordering so the deepest cuts sit at the bottom of the stack.
Hardware Settings That Decide the Result
This is the part most guides leave out, and where beginners lose material. These are starting points for a 10W-20W diode laser on 1/8-inch birch plywood. CO2 lasers run hotter and faster, so reduce power or increase speed accordingly, and always verify against your machine's test card.
| Operation | Power | Speed | Notes |
|---|---|---|---|
| Engrave (shading pass) | 20-30% | 100-150 in/min | Lower power for detail; raise if the burn looks washed out |
| Cut (through layer) | 80-100% | 10-20 in/min | Multiple passes are safer than one slow pass on plywood |
| Score (guide line) | 10-15% | 200-250 in/min | Useful for aligning stacked layers before gluing |
Three settings matter as much as power and speed:
- Focus. Diode lasers have a fixed focal length; the lens-to-material distance must be set with the focus tool or a spacer for every material thickness. A 1/16-inch focus error is enough to turn a clean cut into a scorched one.
- Air assist. A steady air stream blows smoke and debris away from the cut, which reduces charring on the edges and lowers the risk of flare-ups. On plywood, air assist is not optional if you care about clean edges.
- Passes. For 1/8-inch plywood, two passes at 80% power and 15 in/min cut more cleanly than one pass at 100% and 8 in/min, because the second pass clears the kerf rather than fighting the charred material the first pass left behind.
Assembling the Stack
Once the layers are cut, dry-fit them before any glue touches the wood. Stack in order, check that score-pass registration lines line up, and confirm the silhouette reads as intended, a misplaced layer shows now, not after the glue sets. For a permanent bond, wood glue on the flat faces is standard; for a piece you might disassemble, small dowels or alignment pins let you re-stack without damage.
Frequently Asked Questions
Can a JPEG be converted into a multi-layer laser file?
Yes. JPEGs can be converted into multi-layer laser files using layered art software that performs segmentation, depth mapping, and dithering. Tools like Laser Layer Maker, LightBurn, and Inkscape each handle this differently. Laser Layer Maker automates the split into engraving-depth layers and exports to LightBurn SVG, DXF, or xTool Studio. LightBurn and Inkscape require more manual steps but give you granular control over layer ordering and thickness calculation. The key is choosing a tool that matches your volume and skill level.
Is there a free alternative to Imag-R for laser cutting?
GIMP and Inkscape are both free and open-source options for preparing layered art. GIMP handles raster processing, layer state management, and manual dithering. Inkscape excels at vector conversion and SVG export for laser software. Neither is purpose-built for laser engraving, so you will spend more time on pre-processing scripts and manual adjustments. DithX offers a freemium tier focused on dithering. For automated multi-layer generation with less manual work, a dedicated tool may save time.
How do I automatically split images into engraving-depth layers?
Automatic splitting relies on segmentation and depth mapping algorithms. Laser Layer Maker analyzes your image and separates it into layers based on tonal values, then assigns each layer a thickness for engraving. This replaces manual pixel manipulation in GIMP or node-based editing in Inkscape. The output is a set of stacked lines or regions ready for your laser cutter. You can adjust layer count and thickness after the initial split to match your material.
What is the best software for creating depth-based laser art?
The best choice depends on your workflow. For automated multi-layer generation with direct export to LightBurn, DXF, or xTool Studio, Laser Layer Maker empowers creators to transform any photo, cartoon, or logo into professional-grade, laser-ready layered files. For all-in-one control with built-in dithering modes, LightBurn is the industry standard. For manual creative control, GIMP and Inkscape are free and flexible. High-volume shops may prefer Atomm AI for batch processing. Test a few options with a simple photo before committing to a subscription.
What file formats work best for layered laser projects?
SVG and DXF are the most reliable formats for layered laser projects. SVG preserves vector paths and works well with LightBurn and xTool Studio. DXF is widely supported across laser software and handles stacked lines cleanly. PNG with transparency can work for raster-based layers, but you lose vector scalability. When exporting, check that your layer ordering and alpha channel settings carry through. Laser Layer Maker exports to LightBurn SVG, DXF, and xTool Studio formats directly.
Layered art prep is where most laser projects stall, and manual masking in a raster editor is usually the bottleneck. Laser Layer Maker removes that step by splitting any photo, cartoon, or logo into precise engraving-depth layers and exporting straight to LightBurn SVG, DXF, or xTool Studio. If you're tired of rebuilding masks for every order, get started with Laser Layer Maker and spend your workshop time cutting instead of prepping.