
 how-to
How to Prepare Photos for Laser Engraving: 2026 Guide
Table of Contents
- What You'll Need Before You Start
- Step 1: Check Resolution and DPI for Laser Engraving
- Step 2: Convert Your Photo to Grayscale
- Step 3: Adjust Contrast and Brightness
- Step 4: Apply Sharpening and Noise Reduction
- Step 5: Choose Dithering or Halftone Patterns
- Step 6: Invert Your Image for Engraving
- Step 7: Export and Import Your File
- Material-Specific Profiles and Troubleshooting
- AI-Assisted vs. Manual Editing
- Frequently Asked Questions
Last Updated: September 21, 2026
What You'll Need Before You Start
Learning how to prepare photos for laser engraving comes down to small edits that decide whether your burn looks crisp or muddy.
- The highest-resolution version of your photo you can find
- Photo editing software (free tools work fine to start)
- Your laser software, such as LightBurn or xTool Studio
- A scrap piece of your target material for a test burn
- A note of your material type and thickness
Step 1: Check Resolution and DPI for Laser Engraving
DPI (dots per inch) measures how much detail your image holds per unit of space. Aim for at least 300 DPI at your final print size; below that, you risk a soft, pixelated burn. A large photo shrunk down gains effective DPI; a small photo stretched up loses it.
So check two things:
- The pixel dimensions of the file
- The physical size you plan to engrave
Step 2: Convert Your Photo to Grayscale
Grayscale is a black-and-white image made of gray tones instead of color. Your laser only reads light and dark, so color data is wasted. Converting to grayscale is the single most important step to prepare photos for a clean engraving.
Here's how to do it:
- Open your photo in your editing software
- Find the "Convert to Grayscale" or "Desaturate" option
- Check that the image still shows full tonal range, from near-black to near-white
- Save this as your working file
Step 3: Adjust Contrast and Brightness
Contrast controls the gap between your darkest and lightest tones. Brightness shifts the whole image lighter or darker. Both decide how your laser reads shadows and highlights.
Try this:
- Raise contrast until shadows go deep and highlights stay clean
- Nudge brightness so midtones don't crush into black
- Watch the histogram to avoid clipping, where detail is lost at the ends
Step 4: Apply Sharpening and Noise Reduction
Sharpening makes edges pop; noise reduction smooths grain. Laser engraving exaggerates whatever is in the file, so balance both. Over-sharpened photos create harsh halos that burn as ugly outlines, and grainy photos, especially from phone cameras in low light, engrave as speckled messes.
Step 5: Choose Dithering or Halftone Patterns
Dithering and halftone are two ways to fake gray tones with a laser that only burns or doesn't. Dithering scatters dots to create the illusion of shading. Halftone uses a grid of dots of varying size, like old newspaper print.
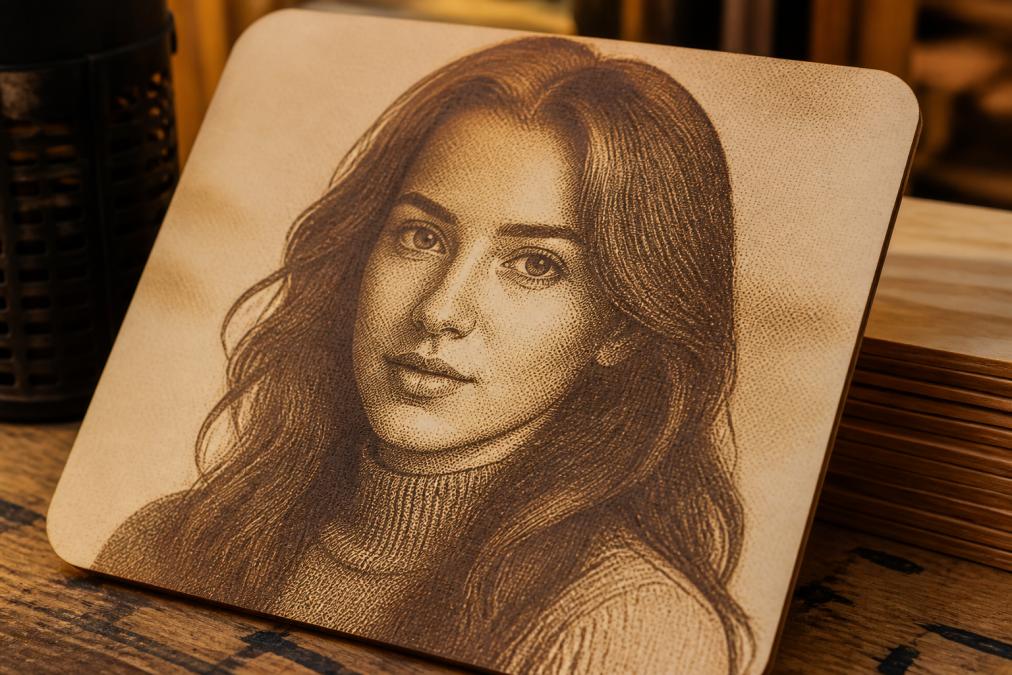
Which should you pick?
- Dithering: best for photos with lots of gradients and fine detail
- Halftone: best for a stylized, retro look or bold graphics
- Threshold: best for pure black-and-white logos with no grays
Step 6: Invert Your Image for Engraving
Inverting flips your image so black becomes white and white becomes black. Whether you invert depends on your material: on light materials like bare wood, you often engrave the dark areas, so you may not need to invert, while on dark or coated surfaces, inverting can produce the look you want.
Here's the rule of thumb:
- Light material, dark burn: usually no invert
- Dark material, light burn: often invert
- Coated tumblers: test both ways on scrap
Step 7: Export and Import Your File
Export settings decide whether your hard work survives the trip into your laser software.
Common choices:
- PNG: keeps sharp edges, good for most photo work
- JPG: smaller files, but compression can add artifacts
- BMP: no compression, larger files, sometimes required
When you import, double-check these output settings:
| Setting | What to Check | Why It Matters |
|---|---|---|
| Resolution | Matches your DPI target | Prevents pixelation |
| Mode | Grayscale, not color | Laser reads tone only |
| Invert | Correct for your material | Wrong setting flips your result |
| Scan gap | Matches dither choice | Avoids moiré patterns |
Material-Specific Profiles and Troubleshooting
Most guides stop at "test on scrap." Two things separate a clean engraving from a muddy one: tuning your prepared file to the specific material, and recognizing which artifact you're looking at so you fix the right variable.
Why material changes everything
A laser doesn't "print" gray, it removes or alters material, and each substrate responds differently to the same power and speed. Bare wood chars and darkens predictably. Coated metal (anodized aluminum, painted tumblers) ablates the coating to reveal a lighter layer underneath, which is why inverting matters there and not on wood. Cast acrylic engraves to a frosty white, while extruded acrylic can gum or craze, and dark acrylic may barely show contrast.
Starting-point profiles
Treat these as launch points, not recipes. Power and speed depend on your wattage and machine, so always confirm with a test burn on scrap of the same material and thickness.
- Bare wood (maple, birch, walnut): Keep strong contrast and use dithering (Jarvis or Stucki) for photographic gradients. Do not invert, the laser darkens the wood where your image is dark. Dark woods like walnut need extra contrast because the grain competes with your tonal range.
- Coated tumblers (powder-coated steel, anodized aluminum): Invert the image so the laser removes coating where your photo is light. Use a small scan gap for fine detail and lower power than on wood, too much power blows through the coating and scars the metal underneath.
- Cast acrylic: Engraves to a frosted white, so a grayscale image with good midtone separation works well. Avoid heavy dithering on clear acrylic, the dots read as noise. Black and dark-tinted acrylic often show almost no contrast.
- Leather (veg-tan): Lower power than wood. Leather darkens fast, so pull highlights up and expect a warmer, browner result than the grayscale preview suggests.
- Slate and stone: High contrast, dithering works well, and the natural surface texture hides minor banding. Forgiving for beginners.
Troubleshooting common engraving artifacts
When a burn goes wrong, the fix is almost never "more power." Match the symptom to the cause:
| Symptom | Likely cause | Fix in your file or settings |
|---|---|---|
| Washed-out, low-contrast result | Flat source image, or wrong invert setting | Raise contrast, verify invert for your material |
| Blown-out highlights (blank white patches) | Contrast clipped to pure white | Pull highlights back; check the histogram for spikes at the right edge |
| Speckled, grainy burn | Camera noise amplified by sharpening | Run noise reduction before sharpening, then re-export |
| Wavy moiré lines | Scan gap doesn't match dither pattern | Set line interval to match your dither dot spacing |
| Banding (horizontal stripes) | Scan gap too wide, or mechanical backlash | Reduce scan gap; check belt tension and wheel play |
| Ghosting / double image | Image shifted mid-burn, or file moved between passes | Confirm the workpiece didn't shift; check for a duplicated layer in your laser software |
| Blurry, soft detail | Source DPI too low for the engrave size | Find a larger source file or engrave smaller |
| Dark, muddy shadows with no detail | Midtones crushed to black | Lift shadows with gamma correction rather than brightness |
The test-burn discipline that saves material
Before any paid job, burn a thumbnail of the actual image on scrap of the same material and thickness. Scale it down, keep the same DPI target, and run it at your intended settings. A two-inch test costs a few minutes; a ruined tumbler or plaque costs the blank plus your time. Keep a notebook of what worked per material, after a dozen jobs you'll have your own profile library.
AI-Assisted vs. Manual Editing
The honest answer isn't "AI is better" or "manual is better", the two tools solve different problems, and the winning workflow uses both.
What each approach is actually good at
AI-assisted tools (background removal in remove.bg or the cutout features in Canva and Photoshop, one-click enhancement, and upscalers like Topaz Photo AI) excel at three things:
-
Background removal, isolating a subject from a cluttered photo, which is tedious to do by hand with the pen tool
-
Upscaling, taking a low-resolution phone photo and generating plausible detail so it survives a larger engrave
-
Batch enhancement, auto-correcting exposure and contrast across dozens of product photos at once
-
Tonal control, precise curves, levels, and gamma adjustments that decide how your grayscale maps to burn depth
-
Dithering and halftone decisions, choosing the pattern and matching it to your scan gap
-
Selective edits, sharpening only the eyes in a portrait, or lifting shadows in one region without touching the rest
Where AI quietly fails for engraving
AI enhancement tools are trained to make photos look good on a screen. That's not the same as making them engrave well. Two common failure modes:
- Over-smoothing. AI denoise and "enhance" features can flatten skin texture and fine detail into a plastic look. On wood, that reads as a featureless blob.
- Hallucinated detail. Upscalers invent texture that wasn't in the original. On a screen it looks sharp; burned into a material, invented edges can turn into harsh halos or unexpected dark patches.
A practical hybrid workflow
- AI pass: Remove the background if needed and upscale a low-res source. Export at the highest resolution the tool offers.
- Manual pass: Convert to grayscale, set contrast and gamma, apply noise reduction then light sharpening, and choose your dither pattern.
- Verify: Check the histogram for clipping and preview the dither at 100% zoom before exporting.
- Test burn: Confirm on scrap before committing.
When to pick which
- One-off gift or personal project: Manual is fine and free. You have the time and you'll learn the controls.
- Etsy shop or small production run: Use AI for the repetitive, low-judgment steps (backgrounds, upscaling, batch exposure) and reserve manual editing for the tonal and dithering decisions that affect quality. That split is where the time savings actually come from.
- High-volume, consistent product line: Build a saved preset or action for your manual steps so every file gets the same treatment, and let AI handle the variable inputs.
Frequently Asked Questions
What resolution is best for laser engraving photos?
Aim for 300 DPI at the final engraving size. If your photo is smaller, upscale it carefully before processing. Higher resolution gives the laser more detail to work with, but going above 600 DPI rarely improves results and slows down engraving time. For most wood and acrylic projects, 300 DPI is the sweet spot.
Can you laser engrave photos?
Yes, but the photo must be prepared correctly. Laser engraving works by burning dots into the material, so you need to convert the photo to grayscale, adjust contrast, and apply dithering or halftone patterns. Without these steps, the engraved result will look muddy or washed out. Proper preparation makes the difference between a blurry mess and a crisp portrait.
How do I adjust contrast and brightness for laser engraving?
Increase contrast so the dark areas stay dark and light areas stay light. This gives the laser clear instructions on where to burn. Lower brightness slightly if your photo looks washed out. Use your editing software's histogram to check for clipping, and avoid blowing out highlights or crushing shadows, as both reduce engraving detail.
What file format should I export for laser engraving?
Export as PNG or BMP for raster engraving because they preserve grayscale data without compression artifacts. Avoid JPG for final exports since it introduces blur. If you need vector paths, convert to SVG or DXF. Most laser software, including LightBurn and xTool Studio, imports these formats without issues.
Preparing every photo by hand gets old fast, especially when orders pile up. Laser Layer Maker turns any photo, cartoon, or logo into laser-ready layered files, splitting images into precise engraving-depth layers automatically. It exports to LightBurn SVG, DXF, and xTool Studio, so you skip the manual rebuild and get straight to burning. Get started with Laser Layer Maker and turn your photo backlog into finished products.