 how-to
Best Way to Export DXF Files for Laser Cutting
Table of Contents
- Why DXF Export Goes Wrong Before You Even Hit Save
- DXF Export Settings for Laser Cutting: What Each Option Actually Does
- How to Export DXF from LightBurn (Step by Step)
- How to Check a DXF File for Open Paths Before Cutting
- DXF vs SVG for Laser Cutting: Which Format to Send to Your Machine
- Common Mistakes That Ruin a DXF Export
- Conclusion: A Repeatable DXF Export Workflow
- Frequently Asked Questions
Last Updated: October 14, 2026
Why DXF Export Goes Wrong Before You Even Hit Save
Most attempts to export DXF files fail before the export dialog even opens. The problem starts with the source file, not the save button.
DXF is a vector format that stores cutting paths as lines, arcs, and curves.
At Laser Layer Maker, we see this constantly: creators export a clean-looking design, open it in LightBurn, and find broken outlines or duplicate cuts.
The good news: you can catch nearly every DXF problem by exporting the right way and checking three things.
The NIST guide to digital file formats notes that vector formats preserve geometry differently, which is why a file that looks fine on screen can behave differently on a machine.
DXF Export Settings for Laser Cutting: What Each Option Actually Does
DXF export settings for laser cutting control how your software writes geometry, units, and version data. Get these three right and most files open cleanly.
Settings live in different places: the export dialog in LightBurn, the "Save As" options in Inkscape or Illustrator.
Units, Precision, and Version: The Three Settings That Break Files
Three settings cause most DXF failures:
- Units: Match the units to your machine. If your laser works in millimeters, export in millimeters. A mismatch scales your design by 25.4x.
- Precision: Set decimal places to 3 or 4. Too few rounds curves into jagged lines. Too many bloats the file.
- Version: Use an older DXF version like R12 or 2000. Newer versions add features many laser programs ignore.
The Autodesk DXF reference documentation explains that DXF version determines which entities a program can read. Older versions are safer for laser software.
Layers, Colors, and Cut Order
Layers tell your laser what to do. Each layer becomes a cut, score, or engrave operation.
- Assign one color per operation
- Keep cut lines on a separate layer from engrave fills
- Order layers so inner cuts happen before outer cuts
If you skip the layer step, your laser may cut the outer shape first and drop the piece before the inner detail is done.
How to Export DXF from LightBurn (Step by Step)
Learning how to export DXF from LightBurn takes about two minutes. LightBurn exports DXF through the File menu, and the settings you pick decide how the file behaves on your machine.
Follow these steps:
- Open your design in LightBurn and confirm all paths are closed
- Go to File > Export
- Choose DXF from the file type dropdown
- Set units to match your laser (millimeters is the common default)
- Pick DXF version R12 or 2000 for best compatibility
- Name the file and save it to a folder you can find
Expected result: A DXF file that opens in your laser software with paths intact and layers preserved.
If the export looks wrong, check your unit setting first. That is the cause more often than anything else.
How to Check a DXF File for Open Paths Before Cutting
The fastest way to check a DXF file for open paths is to re-import it into your design software and look for gaps.
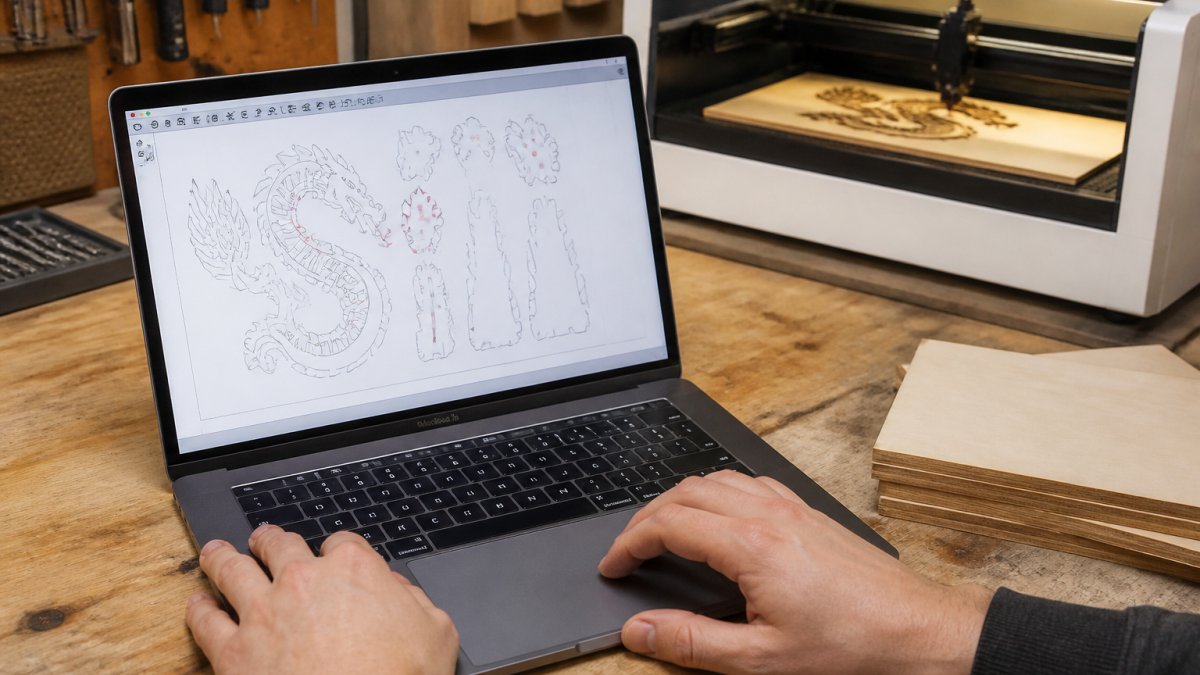
Here is a simple check routine:
- Re-import the DXF into LightBurn or Inkscape
- Zoom in on every corner and joint
- Look for tiny gaps where two lines should meet
- Check for doubled lines sitting on top of each other
- Run a "close path" or "join nodes" command on anything broken
A closed path forms a complete loop; an open path has at least one gap, and lasers treat it as a line to cut, not a shape to trace.
Fixing Open Paths and Duplicate Lines
Fix open paths by joining the endpoints, select the two nodes and use a "join" command. For duplicate lines, use a "remove duplicates" or "simplify" tool. Do this before export: cleaning the source file is faster than patching a broken DXF.
DXF vs SVG for Laser Cutting: Which Format to Send to Your Machine
DXF wins for machine control and cross-software compatibility; SVG wins for web work and color-based layer control. For most laser jobs DXF is safer, but the format you pick also decides how much of your design leaves your machine.
| Feature | DXF | SVG |
|---|---|---|
| Best for | Machine control | Web and design work |
| Layer handling | By layer name | By color and group |
| Software support | Nearly universal | Common but not universal |
| Text handling | Limited | Full text support |
| File size | Usually smaller | Can be larger |
| Cloud round-trip | Rarely required | Often required by browser tools |
DXF stores geometry in a plain, structured way that almost every laser program reads; SVG depends on how the design tool wrote the file, so results vary.
The Cloud Question Nobody Answers Directly
Most guides compare DXF and SVG on geometry alone. The question that matters for a shop sending jobs to a connected laser is simpler: does exporting this format require your file to leave your computer?
A locally installed tool like LightBurn writes the DXF to your disk, nothing is uploaded. A browser-based converter or cloud design tool typically uploads the source file, processes it, and returns a download link.
What to check before you upload a design to any cloud tool:
- What gets uploaded. Some tools send only the geometry; others send the full project, including embedded images, fonts, and metadata like author name and creation date.
- Transport and storage encryption. Look for TLS in transit and encryption at rest. If the provider's documentation does not state both, assume neither.
- Retention window. Ask how long the uploaded file stays on the server and whether deletion is automatic or manual. A tool that keeps files indefinitely is a liability for commercial work.
- Account access controls. Multifactor authentication, per-user roles, and the ability to revoke a session matter more than the export button.
- Export and deletion rights. You should be able to pull your design out in a usable format and request verifiable deletion when you close the account.
Cloud Versus Offline: What Still Works Without Internet
A practical rule: keep the design and export local, and treat the cloud as optional convenience.
- If your internet drops mid-export, a browser tool may lose the job entirely. A locally installed exporter finishes on your disk.
- If the provider has an outage, your machine still runs, but only if the DXF already exists locally.
- If you rely on a cloud library of past jobs, export a local copy of anything you might need to re-cut. Do not assume the provider's backup is your backup.
Sending a Job to a Connected Laser
Once the DXF exists, the next exposure point is the machine. A networked laser is a device with an address and should be treated like one:
- Authenticate the device. Do not leave a networked laser accepting jobs from anyone on the subnet.
- Segment the network. Put the laser on its own VLAN or guest network so a compromised laptop cannot push a job to it.
- Control firmware updates. Apply them deliberately, from the vendor, and keep a record of the version running.
- Verify the job before it fires. Confirm the file name, layer count, and preview match what you sent. An unauthorized or altered job is easier to catch before the head moves than after.
- Know the safe stop. Every operator should know where the e-stop is and how to pause a job mid-cut.
Laser Layer Maker exports to both LightBurn SVG and DXF, so you can pick the format that fits your machine without rebuilding the design.
Common Mistakes That Ruin a DXF Export
The same handful of mistakes wreck DXF files again and again. Avoid these and your exports work on the first try.
- Wrong units: The design scales up or down and no longer fits your material.
- Open paths: The laser cuts a shape in pieces instead of one loop.
- Duplicate lines: The laser burns the same path twice.
- Too few decimal places: Curves turn into jagged, faceted lines.
- Wrong DXF version: The laser software cannot read the file at all.
- No layer separation: Cut and engrave operations run in the wrong order.
- Text left as text: Fonts that are not converted to paths may not export.
A common mistake when you export DXF files is trusting the on-screen preview, it hides gaps and overlaps the laser will find.
Mistakes That Cost You More Than a Sheet of Material
The geometry errors above waste stock.
Assuming a cloud tool deletes your file when you close the tab. Closing a browser is not deletion.
Skipping firmware updates, or applying them blindly. An unpatched machine is exposed; one updated from an unofficial source is worse.
Treating the provider's backup as your backup. Cloud libraries fail, accounts get locked, and subscriptions lapse.
Not knowing who owns the design after upload. Read the terms of service for the intellectual-property clause.
Ignoring the physical risks a bad file creates. A duplicated cut path doubles the burn on thin material and can start a fire. The OSHA laser safety guidance reminds operators that cutting hazards, including fire and fumes, are real risks.
A Pre-Export Checklist
Run this before every job that leaves your machine:
- Source file cleaned, paths closed, duplicates removed, text converted.
- Units, precision, and DXF version set to match the machine.
- Export performed locally, or the cloud provider's encryption, retention, and deletion terms confirmed.
- DXF re-imported and checked for gaps and overlaps.
- Local copy saved outside any cloud library.
- Laser network access and firmware version verified.
Clean the source file, set units and version correctly, then re-import to check for gaps. Add the security checks, local export, retention policy, network access, and you prevent both the ruined sheet and the leaked design.
Conclusion: A Repeatable DXF Export Workflow
Every DXF problem traces back to a dirty source file, wrong settings, or no check before cutting. Build a routine and none will surprise you.
Here is the workflow we recommend:
- Clean the source file and close all paths
- Set units, precision, and DXF version before export
- Re-import the DXF and check for gaps and duplicates
- Fix problems in the source, then export again
Laser Layer Maker makes the first step easier. Our tool turns any photo, cartoon, or logo into laser-ready layered files and splits images into engraving-depth layers.
Stop losing material to broken exports. Get started with Laser Layer Maker and send a clean, cut-ready DXF to your machine every time.
Frequently Asked Questions
What is the best way to export a DXF file for laser cutting?
Export from your design software using R14 or 2000 DXF format, set the units to match your laser software (usually millimeters), and keep precision at 0.001 or finer. Before cutting, open the file in your laser software and check for open paths, duplicate lines, and correct scale. Testing on scrap material first catches most export errors before they waste stock.
How do I export a DXF file from LightBurn?
In LightBurn, select the shapes you want to export, then go to File > Export and choose DXF as the format. Confirm your units match what the receiving software expects, then save.
Why does my DXF file look different after exporting?
Scale changes usually come from a unit mismatch, such as exporting in inches while your laser software reads millimeters. Extra lines often appear when overlapping shapes were not merged before export. Re-export with matching units and welded paths, then reopen the file to verify it before cutting.
Is DXF or SVG better for laser cutting?
DXF works best when you need CAD-level precision, layer control, or compatibility with older laser software and CNC tools. SVG is usually better for LightBurn, xTool Studio, and web-based design tools because it preserves fills, strokes, and colors cleanly. For simple cut lines, either works.
Most creators lose hours to broken DXF files, and the fix starts before export. Laser Layer Maker turns any image into laser-ready layered files, splits designs into engraving-depth layers, and exports to LightBurn SVG, DXF, and xTool Studio. Get started with Laser Layer Maker and send a clean, cut-ready file to your laser on the first try.