 how-to
How to Fix Open Vector Paths for Laser Cutting
Table of Contents
- How to Find Open Paths in Illustrator
- How to Close a Path in Illustrator
- Check for Open Vectors in LightBurn
- Fix Broken Vectors for Laser Cutting
- Adjusting Path Roundness and Sharpness
- Selecting and Assigning Toolpaths
- Troubleshooting Transparency Issues
- Trimming Overlapping Vector Objects
- Frequently Asked Questions
Last Updated: October 7, 2026
How to Find Open Paths in Illustrator
An open vector path is a line or shape whose start and end points never connect, and it is the single most common reason a laser cutter refuses to cut a design. Learning how to fix open vector paths starts with finding them.
The fastest way to spot them is visual, not technical.
Visual Diagnostic Checklist
Run through this list before you export anything:
- Zoom to 400% and look for gaps at shape corners
- Turn on View > Outline mode to strip away fills and strokes
- Check that every shape shows a continuous blue line
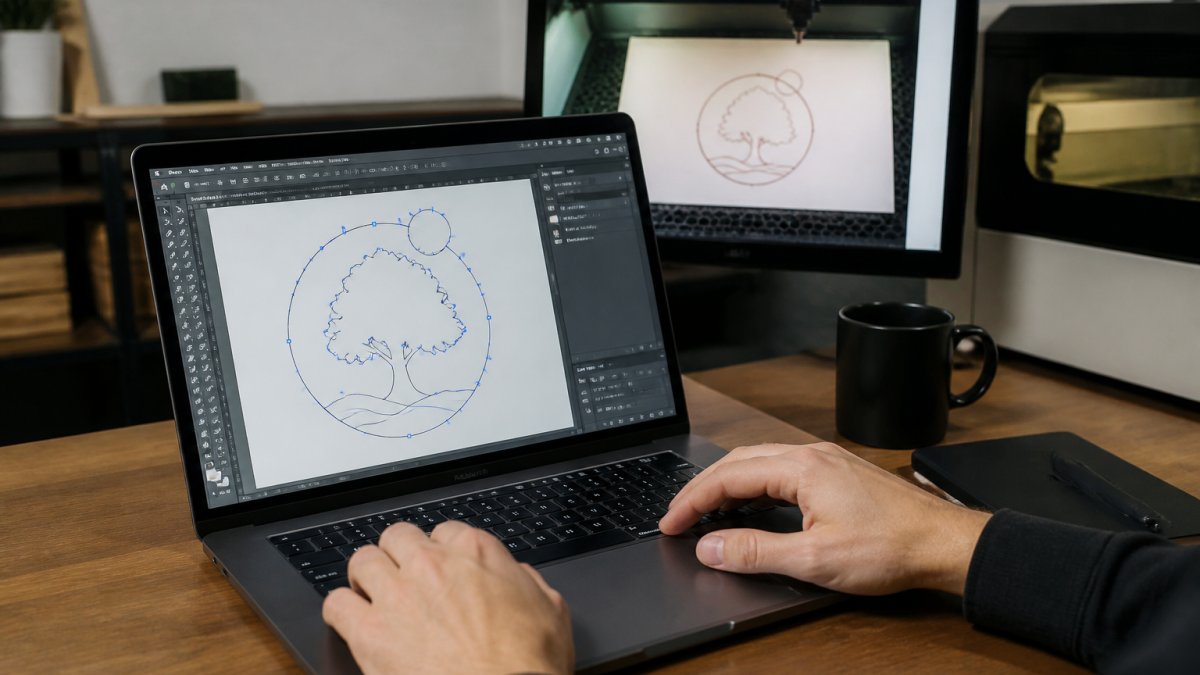
Once you have found the breaks, the next step is closing them. For a deeper look at path geometry, Adobe's own documentation on editing paths and anchor points is a solid reference.
How to Close a Path in Illustrator
The Join command is the standard way to close a path in Illustrator, and it takes seconds once you know where to click. Select the two end anchor points, then press Ctrl+J on Windows or Cmd+J on Mac. The two points merge into one, and the path becomes closed.
There are two variations worth knowing:
- Join connects two separate open paths into one
- Average and Join snaps the points together first, which is useful when the ends are slightly apart
Using the Join Command
Select the path with the Direct Selection tool. Click the two endpoints while holding Shift. Then hit Ctrl+J. If the points were far apart, Illustrator draws a straight segment between them, which can distort your shape. In that case, use Object > Path > Average first to line them up.
A few mechanics worth internalizing, because they explain almost every Join failure:
- Join only works on two endpoints of the same path or on the endpoints of two selected paths. If you select a midpoint, nothing happens.
- If the two endpoints sit on top of each other, Join produces a single anchor point. If they are apart, Join draws a straight segment between them, that segment is a real cut line, so a sloppy join can add geometry you did not intend.
- A path with a fill but an open stroke can look closed on screen. Join changes the geometry, not the appearance, so verify in View > Outline after joining.
Automated Path Closing Scripts
Manual joining works for a handful of gaps. It falls apart when a file has hundreds of them, which is the normal state of a traced SVG or a converted DXF.
Several free scripts and extensions close every open path in a document with one click. The mechanism is consistent across them:
- The script walks every sub-path in the document.
- It collects all endpoints (anchor points with exactly one attached segment).
- It pairs endpoints that fall within a user-set tolerance, usually measured in the document's units, so a tolerance of 0.5 pt is roughly 0.007 in.
- It joins each pair, either with a straight segment or by averaging the two points first.
That tolerance value is the whole game. Set it too wide and the script will weld separate shapes together, two letters in a logo become one blob, or a hole in a shape gets sealed shut.
Two habits make automated closing safe:
- Work on a copy. Scripts modify geometry in place, and there is no undo history entry for a batch operation that touched 400 paths.
- Run the visual diagnostic checklist again after the script finishes. Automation closes what it can find; it does not tell you whether the result is correct.
If a script reports zero closed paths, your tolerance is almost certainly too tight. Increase it in small steps rather than jumping to a large value.
Check for Open Vectors in LightBurn
LightBurn flags open vectors automatically, which makes it far easier to catch problems before a cut. When you import a file, the software marks any open path in a different color and lists it in the cut settings panel. If you see a shape you expected to cut showing up as a line, that is your open path.
Here is how to check quickly:
- Import your SVG or DXF file
- Open the Cut Settings window
- Look for any entry labeled as a line rather than a shape
Why Paths Break During File Conversion
If you are working across multiple programs, the workflow matters. Many creators design in Illustrator, export as SVG, and cut from LightBurn. That handoff is where paths break most often, and it is the step almost no tutorial explains.
Conversion breaks paths for a small number of predictable reasons:
- Unit mismatch. A file authored in points and imported as millimeters can shift coordinates enough that endpoints that were coincident no longer are. The gap is invisible at fit-to-screen zoom.
- Curve flattening. Some exporters approximate bezier curves as many short straight segments. If the exporter drops the final segment, the path ends one segment short of closing.
- Precision rounding. Exporters that round coordinates to a fixed number of decimal places can push two endpoints apart by a fraction of a unit, enough to break a join, not enough to see.
A Conversion-Stage Diagnostic Framework
Rather than hunting for breaks after every export, check the file at each stage. The stage where the path count changes is the stage that broke it.
- Before export: run the visual diagnostic checklist and note the number of open paths.
- After export, before import: open the exported SVG in a browser or a text editor and count
<path>elements. A shape that was one path in the editor but is three paths in the file was split during export. - After import: use Edit > Select Open Shapes in LightBurn and compare the count to your pre-export number. A higher count means the importer or the exporter introduced breaks.
- Fix at the source. Close the paths in the original editor and re-export, rather than patching them in the cutting software. Patching downstream means the next export will break them again.
A few export settings reduce breakage across the board:
- Export SVG at a high coordinate precision rather than a rounded one.
- Match the document unit to the unit your cutting software expects.
- Avoid flattening groups and layers unless the cutting software requires it.
- Keep curves as curves; do not convert to polylines unless the target software cannot read beziers.
Fix Broken Vectors for Laser Cutting
Broken vectors for laser cutting usually fall into two groups: artifacts left over from tracing, and segments that simply do not touch. Both cause the same failure, but they need different fixes.
Fixing Artifacts and Tiny Closed Paths
Auto-tracing tools love to leave behind tiny closed paths, stray dots, and doubled lines. These artifacts bloat your file and confuse the laser. Clean them up with Object > Path > Clean Up, which removes stray points and empty paths. Then use the Pathfinder tool to merge overlapping shapes into one clean outline.
Connecting Disjointed Path Segments
When two segments should meet but do not, zoom in and drag one endpoint onto the other. Illustrator snaps them together when they are close. If snapping fights you, turn on Smart Guides under the View menu. For a full breakdown of boolean operations and path merging, the LightBurn documentation on editing shapes covers the software side well.
Adjusting Path Roundness and Sharpness
Path roundness is controlled by the handles on each anchor point, which shape the bezier curves between them. Long handles create smooth curves; short handles create tight ones. To sharpen a corner, delete the handles on that point.
A few practical rules:
- Use Convert Anchor Point to switch between smooth and corner points
- Keep handle lengths balanced on both sides of a point for clean curves
- Avoid overlapping handles, which create loops and self-intersections
Self-intersecting paths are a hidden cause of cut failures. The laser does not know which side is inside, so it may cut the wrong area.
Selecting and Assigning Toolpaths
A toolpath is the route the laser follows, and every closed shape needs one assigned correctly. In LightBurn, each shape gets a layer, and each layer gets a mode: cut, score, or engrave. Assign the wrong mode and a cut becomes a shallow mark.
| Shape State | Laser Behavior | Fix |
|---|---|---|
| Closed path | Cuts the full outline | None needed |
| Open path | Scores or ignores the line | Close the path |
| Overlapping shapes | Double-cuts the same line | Merge with Pathfinder |
| Tiny artifact | Cuts a stray dot | Delete with Clean Up |
Check your layer assignments before every run. It takes thirty seconds and saves ruined material.
Troubleshooting Transparency Issues
Transparency masks and clipping masks can hide open paths from view, which makes them nearly impossible to find by eye. A shape sitting inside a clipping mask may look closed on screen while its actual geometry is open underneath.
To fix this, release the mask with Object > Clipping Mask > Release, then check each path individually. If you are building layered engraving files, our tool splits images into clean engraving-depth layers and exports straight to LightBurn SVG, DXF, or xTool Studio, which keeps path geometry intact through the handoff.
Trimming Overlapping Vector Objects
Overlapping objects create double-cut lines and wasted machine time. The fix is trimming: cutting away the hidden parts of one shape where another sits on top.
Use the Shape Builder or Pathfinder tools to trim overlaps. Select both shapes, then click the region you want to keep. The result is a single clean outline with no duplicate segments. This also reduces cut time, since the laser no longer travels the same line twice.
Open vector paths will stall a laser job every time, and hunting them down by hand gets old fast. Our tool splits images into precise engraving-depth layers, exports to LightBurn SVG, DXF, and xTool Studio, and simplifies the whole preparation step so you spend your time cutting, not fixing.
Frequently Asked Questions
What is an open vector path?
An open vector path is a line or curve that has at least one endpoint not connected to another segment. In laser cutting, open vector paths prevent the laser from following a continuous contour, which can lead to incomplete cuts or the laser returning to its origin without cutting the shape. Common causes include accidental deletions during node editing, importing files from different software, or using auto-trace tools that produce fragmented paths.
How do I find open paths in Adobe Illustrator?
Use the Direct Selection Tool (A) to click on a path. Open paths show distinct endpoints without a connecting segment. For a faster check, go to Select > Object > Direction Handles or use the Document Info panel to count open paths. Third-party scripts like Select Open Paths can highlight them instantly. Always zoom in to 200% or more to spot tiny gaps that are invisible at normal zoom.
Why does my laser cutter show an open vector path error?
Laser cutters like those running LightBurn or xTool Studio require closed paths to cut shapes. An open vector path error means the software detected a break in the contour, so it cannot generate a continuous toolpath. This often happens after importing SVG or DXF files from Illustrator or Inkscape. Check for open vectors in LightBurn by using the Edit > Select Open Shapes command and then close them with the Join or Auto-Join feature.
Can open paths be used for laser engraving?
Yes, open paths can be used for laser engraving when you want to create lines, scores, or vector engravings. However, for cutting through material, paths must be closed. If you are engraving a design that requires filled areas, the paths need to be closed and filled. For line engravings, open paths are fine, but ensure they are continuous to avoid gaps in the engraved line.