 how-to
Simplify Laser Engraving Workflow for Etsy
Table of Contents
- Why Laser Engraving Workflow Efficiency Matters for Etsy Sellers
- Building Your Laser Engraving Order Form Template
- Setting Up Your LightBurn Engraving Workflow
- Managing Batch Laser Engraving Orders at Scale
- Creating a Laser Engraving Production Checklist
- Preparing Artwork and Engraving Files for Consistency
- Handling Personalization and Variant Management
- Conclusion
- Frequently Asked Questions
Last Updated: October 17, 2026
Why Laser Engraving Workflow Efficiency Matters for Etsy Sellers
Running an Etsy shop that produces custom laser-engraved products means managing orders, files, and production schedules at once. When your laser engraving workflow isn't simplified, repetitive tasks eat your time and profit margin, and every reworked design file costs hours you could spend on marketing or new orders.
The bottleneck isn't the laser engraver itself, most machines work fine. It's everything before and after the machine runs: preparing artwork, organizing files, tracking variants, quality checks, and shipping. A simple order-to-shipping workflow prevents mistakes and saves hours per week.
Here's what changes when you simplify your laser engraving workflow:
- Orders move from inbox to production to shipment without confusion
- Design files stay organized and reusable for future batches
- You catch mistakes before they waste materials
- Personalization requests don't derail your schedule
- You know exactly how much each order costs to produce
This guide walks you through building a system that works at any scale.
Building Your Laser Engraving Order Form Template
An order form template captures all the information you need before production starts. Without one, you'll chase customers for missing details or guess at specifications and regret it later.
Essential Information to Capture
Your form should collect four categories of data: product details, customization requests, material preferences, and delivery timeline.
Start with the product: tumbler, wood plaque, acrylic sign, leather patch, or something else.
Next, capture customization details: text, image, logo, or a combination? If text, what font and size?
Finally, ask for delivery timeline. Rush orders cost more or need priority scheduling. Standard orders fit into batch production.
Automation and Integration Points
Your order form should feed directly into your production system, manual data entry wastes time and introduces errors.
If you use Etsy, set up an integration that pulls order details into a spreadsheet or production management tool.
For personalization requests, automation is critical.
Automate customer communication too: send a confirmation email with specifications when an order enters production (catching misunderstandings early) and a tracking update when it completes.
Setting Up Your LightBurn Engraving Workflow
LightBurn is the most common software for managing laser engraving files. Setting it up correctly means your laser engraving workflow runs smoothly every time.
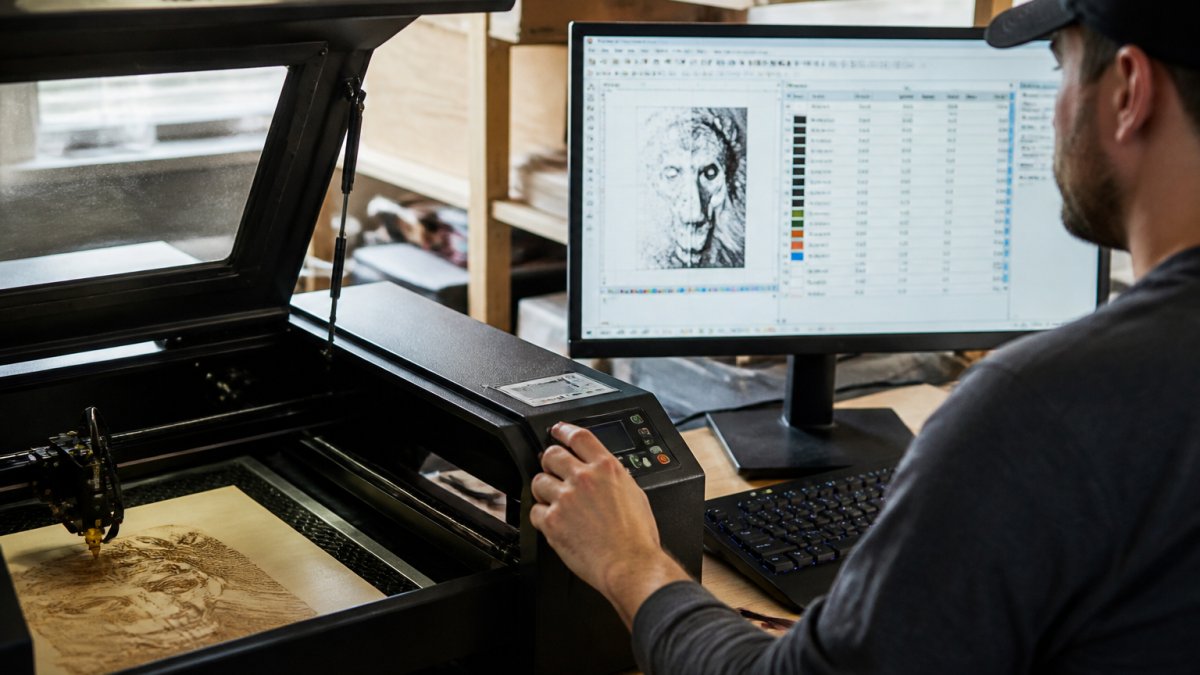
File Import and Layer Organization
When you import a file into LightBurn, organize it by layer from the start.
Import your artwork file, SVG, PDF, or image. LightBurn shows it as a single layer initially. Your next step is to split it into depth layers.
If you're using Laser Layer Maker, the file arrives already split into depth layers, each representing a different engraving depth.
Save your organized file as a template.
Machine Settings and Repeatability
Repeatability is the foundation of efficient production. If the same design produces different results each time, you'll waste materials and frustrate customers.
Document your machine settings for each material.
Before a full batch, test your settings on scrap material.
Save tested settings in LightBurn as presets. Instead of entering power and speed manually for each order, select the preset, faster production and consistent results.
Managing Batch Laser Engraving Orders at Scale
Batching orders by material and design is how you move from one-off projects to real production. Batching reduces machine setup time and lets you run longer, more efficient production sessions.
Grouping Orders by Material and Design
When you have five orders for wood plaques and three for acrylic signs, don't engrave them randomly. Group all the wood plaques together and run all the acrylic signs in one session, so you set up the machine once per material, not once per order.
If two customers ordered the same design on the same material, engrave them back-to-back, same settings, same file, just load new blanks and run again. It's the fastest, most efficient way to produce.
Create a production schedule that groups orders by material first, then by design within that material. Your schedule might look like:
- Session 1: Wood plaques, three different customer names (same base design, different personalization)
- Session 2: Acrylic signs, two different designs
- Session 3: Leather patches, four matching designs
This grouping minimizes material changes and machine adjustments.
Production Time and Cost Benchmarks
Knowing how long each order takes helps you price accurately and set delivery expectations. Track your production time for common products.
A simple text engraving on a tumbler might take 5-10 minutes from loading to unloading. A detailed photograph on a wood plaque might take 20-30 minutes.
These numbers determine your hourly rate and profitability.
Track material waste too. Losing 10% of your material to mistakes or test cuts affects your margins, and reducing waste improves profitability.
Creating a Laser Engraving Production Checklist
A checklist prevents mistakes and ensures every order meets your quality standard. It's a simple tool that saves time and protects your reputation.
Pre-Production Quality Control
Before you engrave anything, verify the design file. Open it in LightBurn and check:
- Does the design match the customer's order?
- Are all layers present and named correctly?
- Is the image resolution high enough for clean engraving?
- Are the dimensions correct for the product?
- Does personalization (names, dates, text) match the order?
A 2-minute check prevents engraving the wrong design on 10 products. This is the most valuable 2 minutes of your production day.
Next, prepare the material. Load the blank product onto your machine. Ensure it's flat and secure. Position it so the engraving area is centered.
Finally, run a test on scrap material if you haven't used these exact settings recently. A quick test confirms your settings are correct before you commit to the customer's product.
Post-Production Inspection and Rework
After engraving, inspect the finished product before shipping. Check for:
- Uneven engraving depth (some areas darker or lighter than others)
- Incomplete lines or missing details
- Material damage or burns around the engraved area
- Dust or residue still clinging to the product
If the engraving looks incomplete or uneven, investigate before moving to the next order. Did your settings drift? Is the laser lens dirty? Did you load the material incorrectly?
Some products need cleanup. Acrylic sometimes has a frosted edge around the engraved area. Wipe it clean or sand it lightly. Leather might have slight char marks. A damp cloth removes most of it.
Document any rework. If you had to re-engrave three plaques because the first attempt was too shallow, note that.
Preparing Artwork and Engraving Files for Consistency
The quality of your engraved product depends entirely on the quality of your file. A blurry image produces a blurry engraving. A poorly converted vector produces jagged lines.
Image-to-File Conversion Best Practices
When a customer uploads a photo, it's usually a JPEG or PNG. Laser engravers work best with vector files or high-resolution images prepared for engraving. Converting an image properly takes a few steps.
First, assess the image quality. Is it sharp or blurry? Are there lots of fine details or is it simple? A simple cartoon converts easily.
If you're converting a photograph to an engraving file, you have two paths: grayscale raster engraving or vector conversion.
Laser Layer Maker handles this conversion automatically. You upload a photo or logo, and it outputs a layered file ready for engraving.
If you're converting files manually, use software like Adobe Illustrator or free alternatives like Inkscape.
Testing Designs Before Full Batch Production
Never engrave a new design on customer products without testing it first. A test takes 5 minutes and saves you from ruining an entire batch.
Print or engrave your test design on scrap material. Look at the result:
- Is the image clear or blurry?
- Are fine details visible or lost?
- Are the proportions correct?
- Is the depth right for the material?
If the test looks good, you're ready for production. If it looks wrong, adjust your settings or your file and test again. This iterative testing ensures your final product meets your standard.
Document successful test results. Save the settings, the file, and a photo of the test product.
Handling Personalization and Variant Management
Personalization is a major selling point for Etsy shops. Customers want their name on the tumbler or a custom date on the plaque. Managing these variants efficiently determines whether personalization increases your profit or your workload.
Dynamic Text and Name Engraving
The fastest way to handle personalization is with templates that accept variable text.
In LightBurn, you can create a template with a text placeholder.
Some design software and file preparation tools support even more automation. If you're using Laser Layer Maker, you can set up fields for customer names and dates.
For complex personalization, like a custom date, initials, and a message, create a template that has all three fields.
Tracking Variants in Your Etsy Shop
On Etsy, variants let you offer the same product in different configurations, different materials, colors, or sizes.
In your Etsy listing, create variants for each option the customer can choose. If you offer a wood plaque in three sizes, create three variants.
In your production system, track which variant each order is.
Also track inventory by variant. If you're running low on 8x10 acrylic blanks, you know to reorder before you take more orders for that size.
Conclusion
A simplified laser engraving workflow transforms your Etsy business from chaotic and time-consuming to organized and profitable. The steps are simple: capture order details upfront, organize your files by layer and material, batch similar orders together, test before production, and inspect after.
The biggest time-saver is automating file preparation. Laser Layer Maker converts your photos and logos into laser-ready layered files automatically. Your files import into LightBurn ready to use, with depth layers already split and organized.
Frequently Asked Questions
How do I set up a laser engraving workflow for Etsy orders?
Start by capturing order details in a standardized form that includes customer name, product type, material, design file, and personalization requests. Import designs into LightBurn or your chosen software, organize layers by engraving depth, test on scrap material, and establish a batch production schedule grouped by material type. Use a production checklist to track each order from file prep through quality inspection and shipping. Automation tools that sync Etsy orders directly to your workflow software save significant time and reduce manual data entry errors.
What should a laser engraving order form template include?
Your laser engraving order form template should capture the customer's design file or image, requested material (wood, acrylic, leather, etc.), engraving depth preference, any personalization text, quantity, and deadline. Include fields for material cost, engraving time estimate, and total price. Add checkboxes for design approval confirmation and revision requests. Link the form directly to your inventory system so material availability updates automatically. This prevents double-booking and ensures consistent information flows into your production workflow.
How can I reduce time preparing laser engraving files?
Batch similar designs together and reuse tested settings for recurring materials. Create file templates for common products (tumblers, signs, coasters) with preset layer depths. Use tools that split photos into engraving-depth layers, eliminating manual layer creation. Test designs once on scrap material, then save those settings as presets for future orders. Store all approved files in a organized folder structure by product type and material, so repeat orders require only minor customization rather than starting from scratch.
What file formats work best with LightBurn and xTool Studio?
LightBurn accepts SVG, PDF, DXF, and AI files natively. xTool Studio works well with SVG, DXF, and PNG files. For consistency across both platforms, export files as SVG with layers clearly labeled by engraving depth or power setting. Avoid rasterized formats (JPG, PNG) for precision work unless you're engraving photo-quality images. Always test exported files on your specific machine before running a full batch.